A-pillar Wire Routing
⚠️ This wiki is community-maintained. The wiki should NOT be considered "word of comma". Edit suggestions are welcome and encouraged!
What is an A-pillar?
](https://files.readme.io/0400164-Screenshot_2024-04-17_at_2.52.26_PM.png)
Source: Edmunds
An "A-pillar" is one of the vertical supports at the sides of a car's windshield, extending from the dashboard to the roof. It helps hold up the roof and maintain the structure of the cabin, especially during a rollover.
Airbags in the A-pillar are there to enhance safety. They deploy during side impacts or rollovers to protect the heads and upper bodies of the driver and front passenger, filling the gap between occupants and the vehicle's hard surfaces.
Inside of an A-pillar
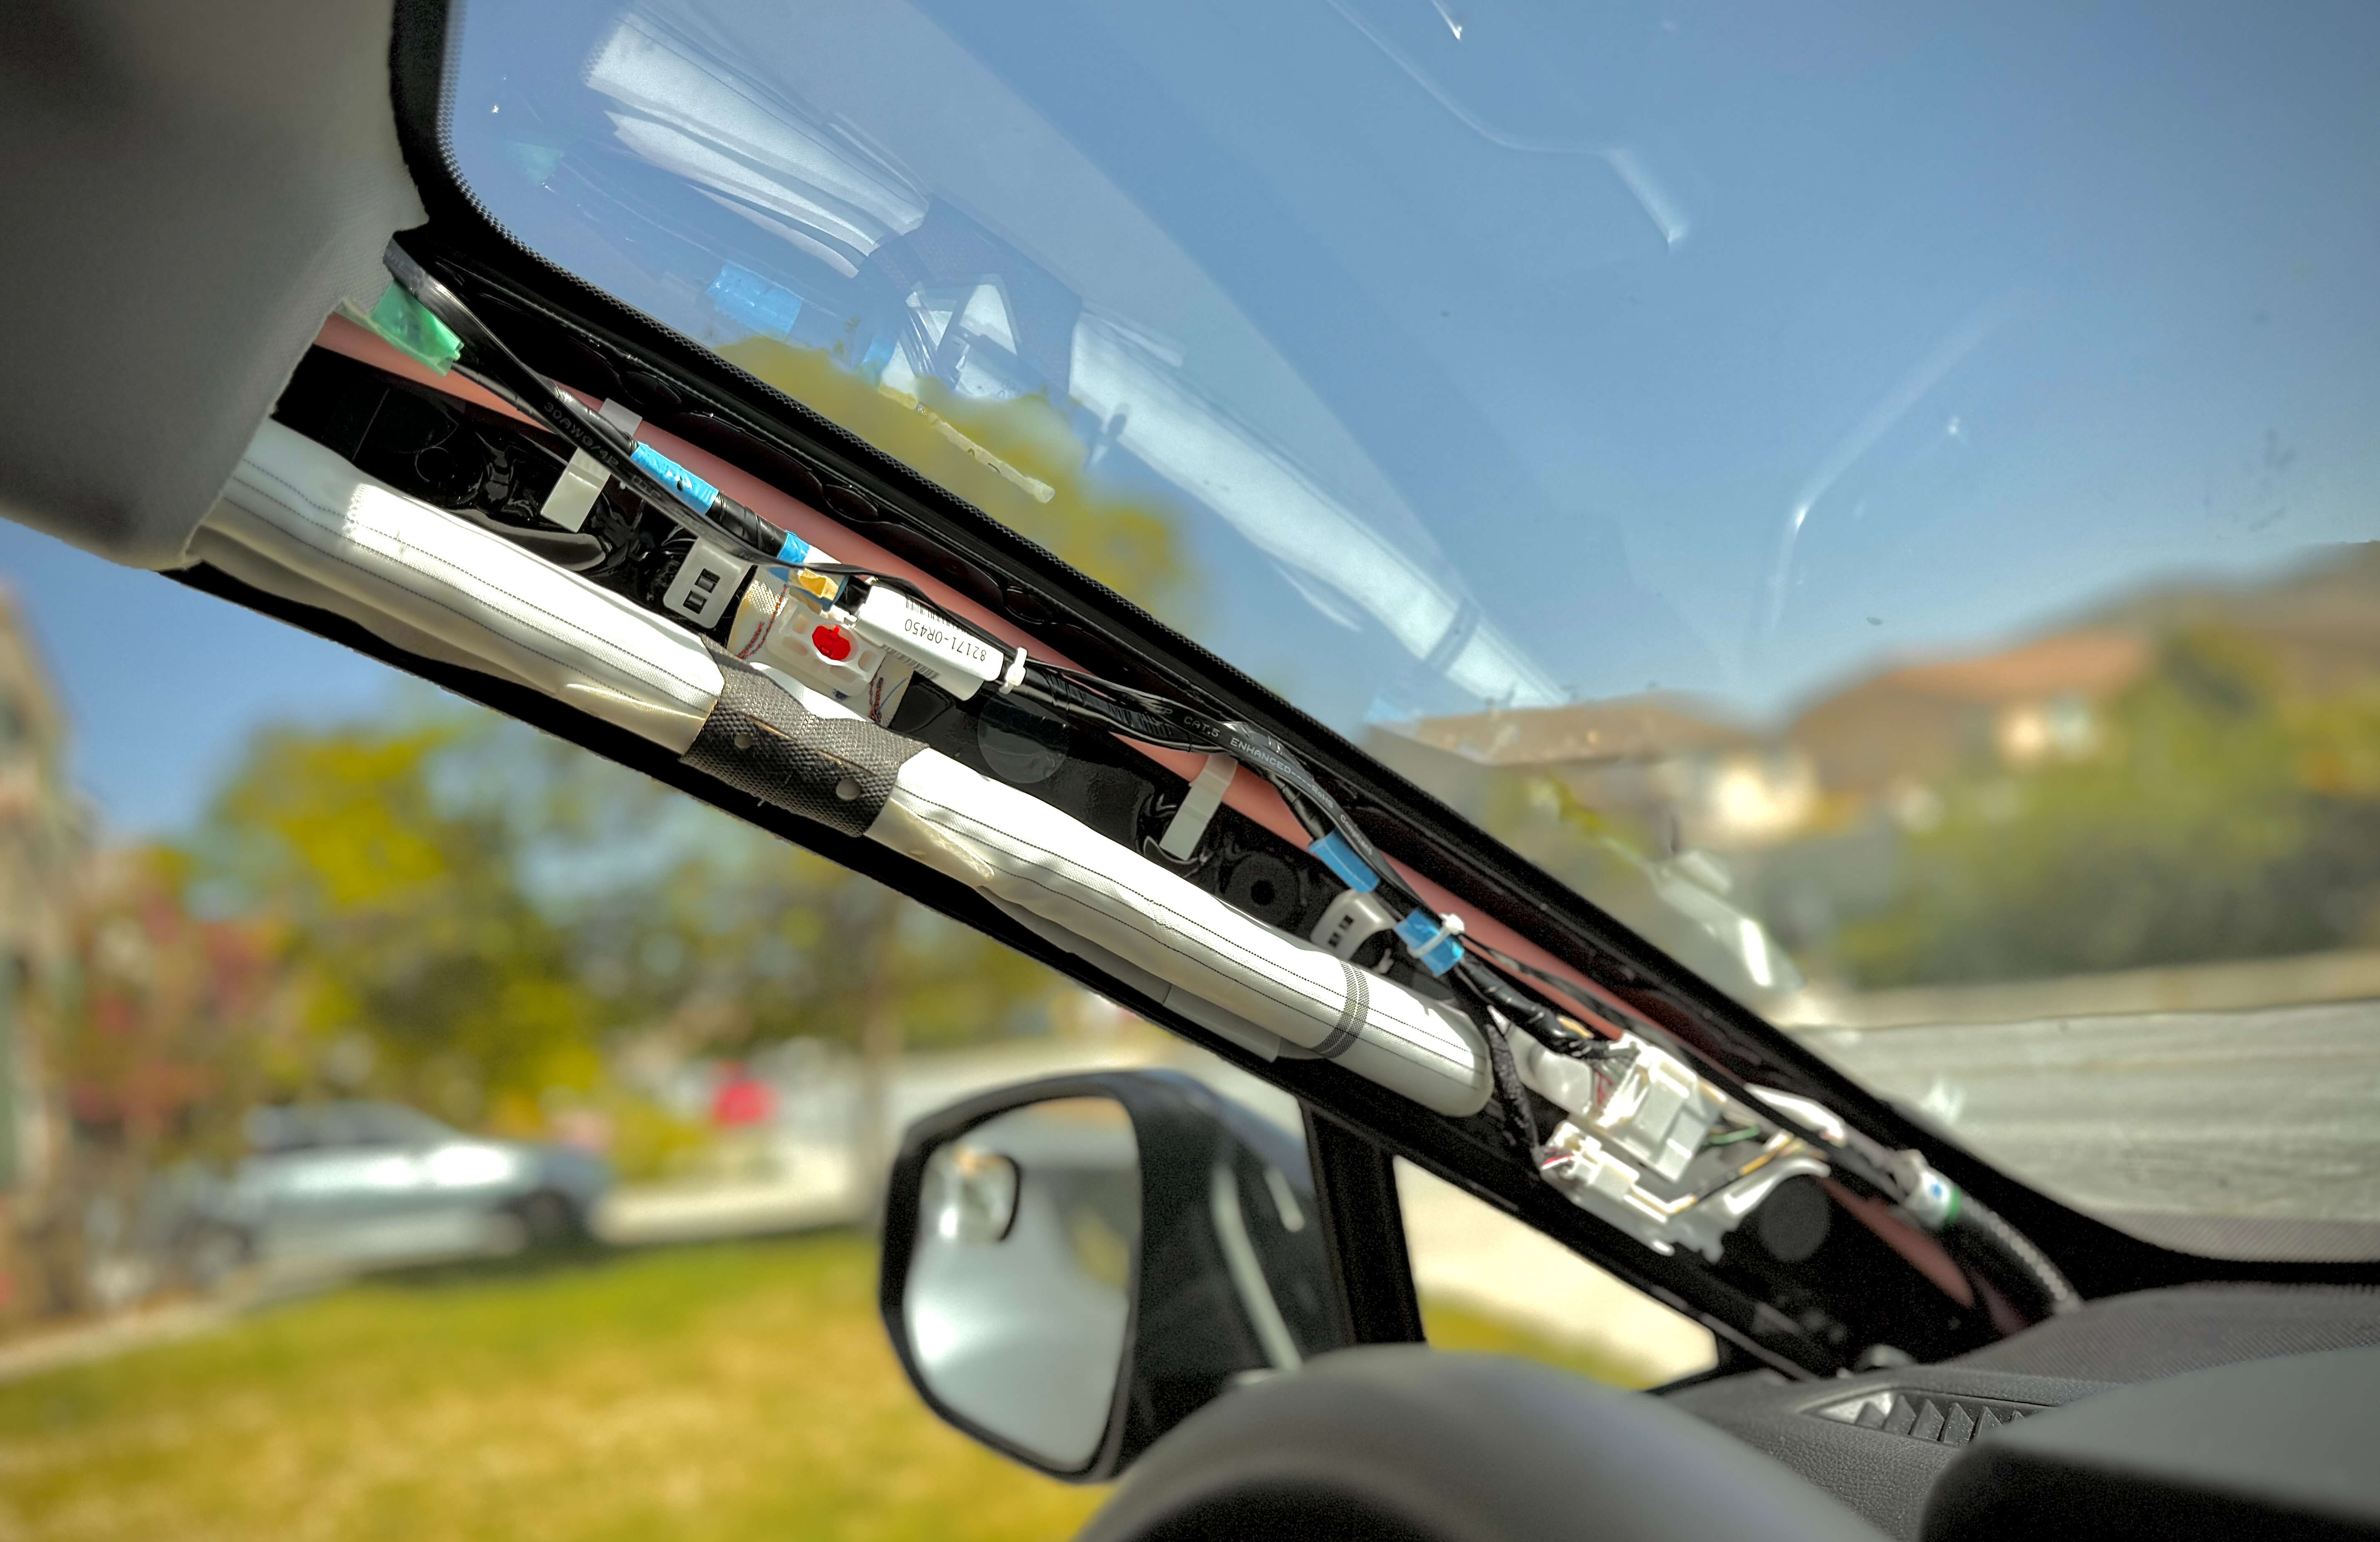
RAV4 2021 inside A-pillar
Curtain airbags are located in the A-pillar in most cars today. Above you will see the white rolled-up airbag that is below the factory wiring.
](https://files.readme.io/fc675ba-Screenshot_2024-04-21_at_4.28.37_PM.png)
Source: Youtube - IIHS
In a video by IIHS on YouTube, you will see the side airbags being deployed in real time. The side airbags will deploy from the bottom, so anything that is in the path of the airbag when it goes off is highly not recommended.
Look up online for side airbags or side curtain airbags being tested. This will give you a better idea of how these airbags are being used and how a cable restricting this airbag may lead to a dangerous outcome.
⚠️ Why is this important?
When routing cables through the A-pillar it is important not to go over the airbag or be in the way of its path when the airbag deploys. It is also important to disconnect the battery of the vehicle (see below for more details). If routing wire through A-pillar make sure to find any factory wires that are already there. The factory wire should be located above the airbag between the windshield and the airbag as seen in the RAV4 example above. Route the wire in the same path as the factory wire and use zip ties to ensure the cable that you are routing stays in place.
Things to do BEFORE removing A-pillar
- Turn off the vehicle's ignition and take the key out of the ignition switch.
- ⚠️ Disconnect the vehicle battery. After disconnecting the battery, wait at least 30 minutes to an hour before starting your work. This waiting period allows time for any residual electrical charge stored in the airbag system’s capacitors to dissipate. Capacitors are designed to deploy the airbag in the event of a collision, even if the car loses battery power, so it’s crucial to ensure they are fully discharged.
- Always refer to the vehicle's service manual for specific procedures related to your car model, as airbag system designs can vary.
- Familiarize yourself with vehicle airbag deployment mechanisms through searching online, Discord help, vehicle's service manual, etc.
Removing the A-Pillar
The best way to learn how to remove the A-pillar for your specific model is to YouTube it.
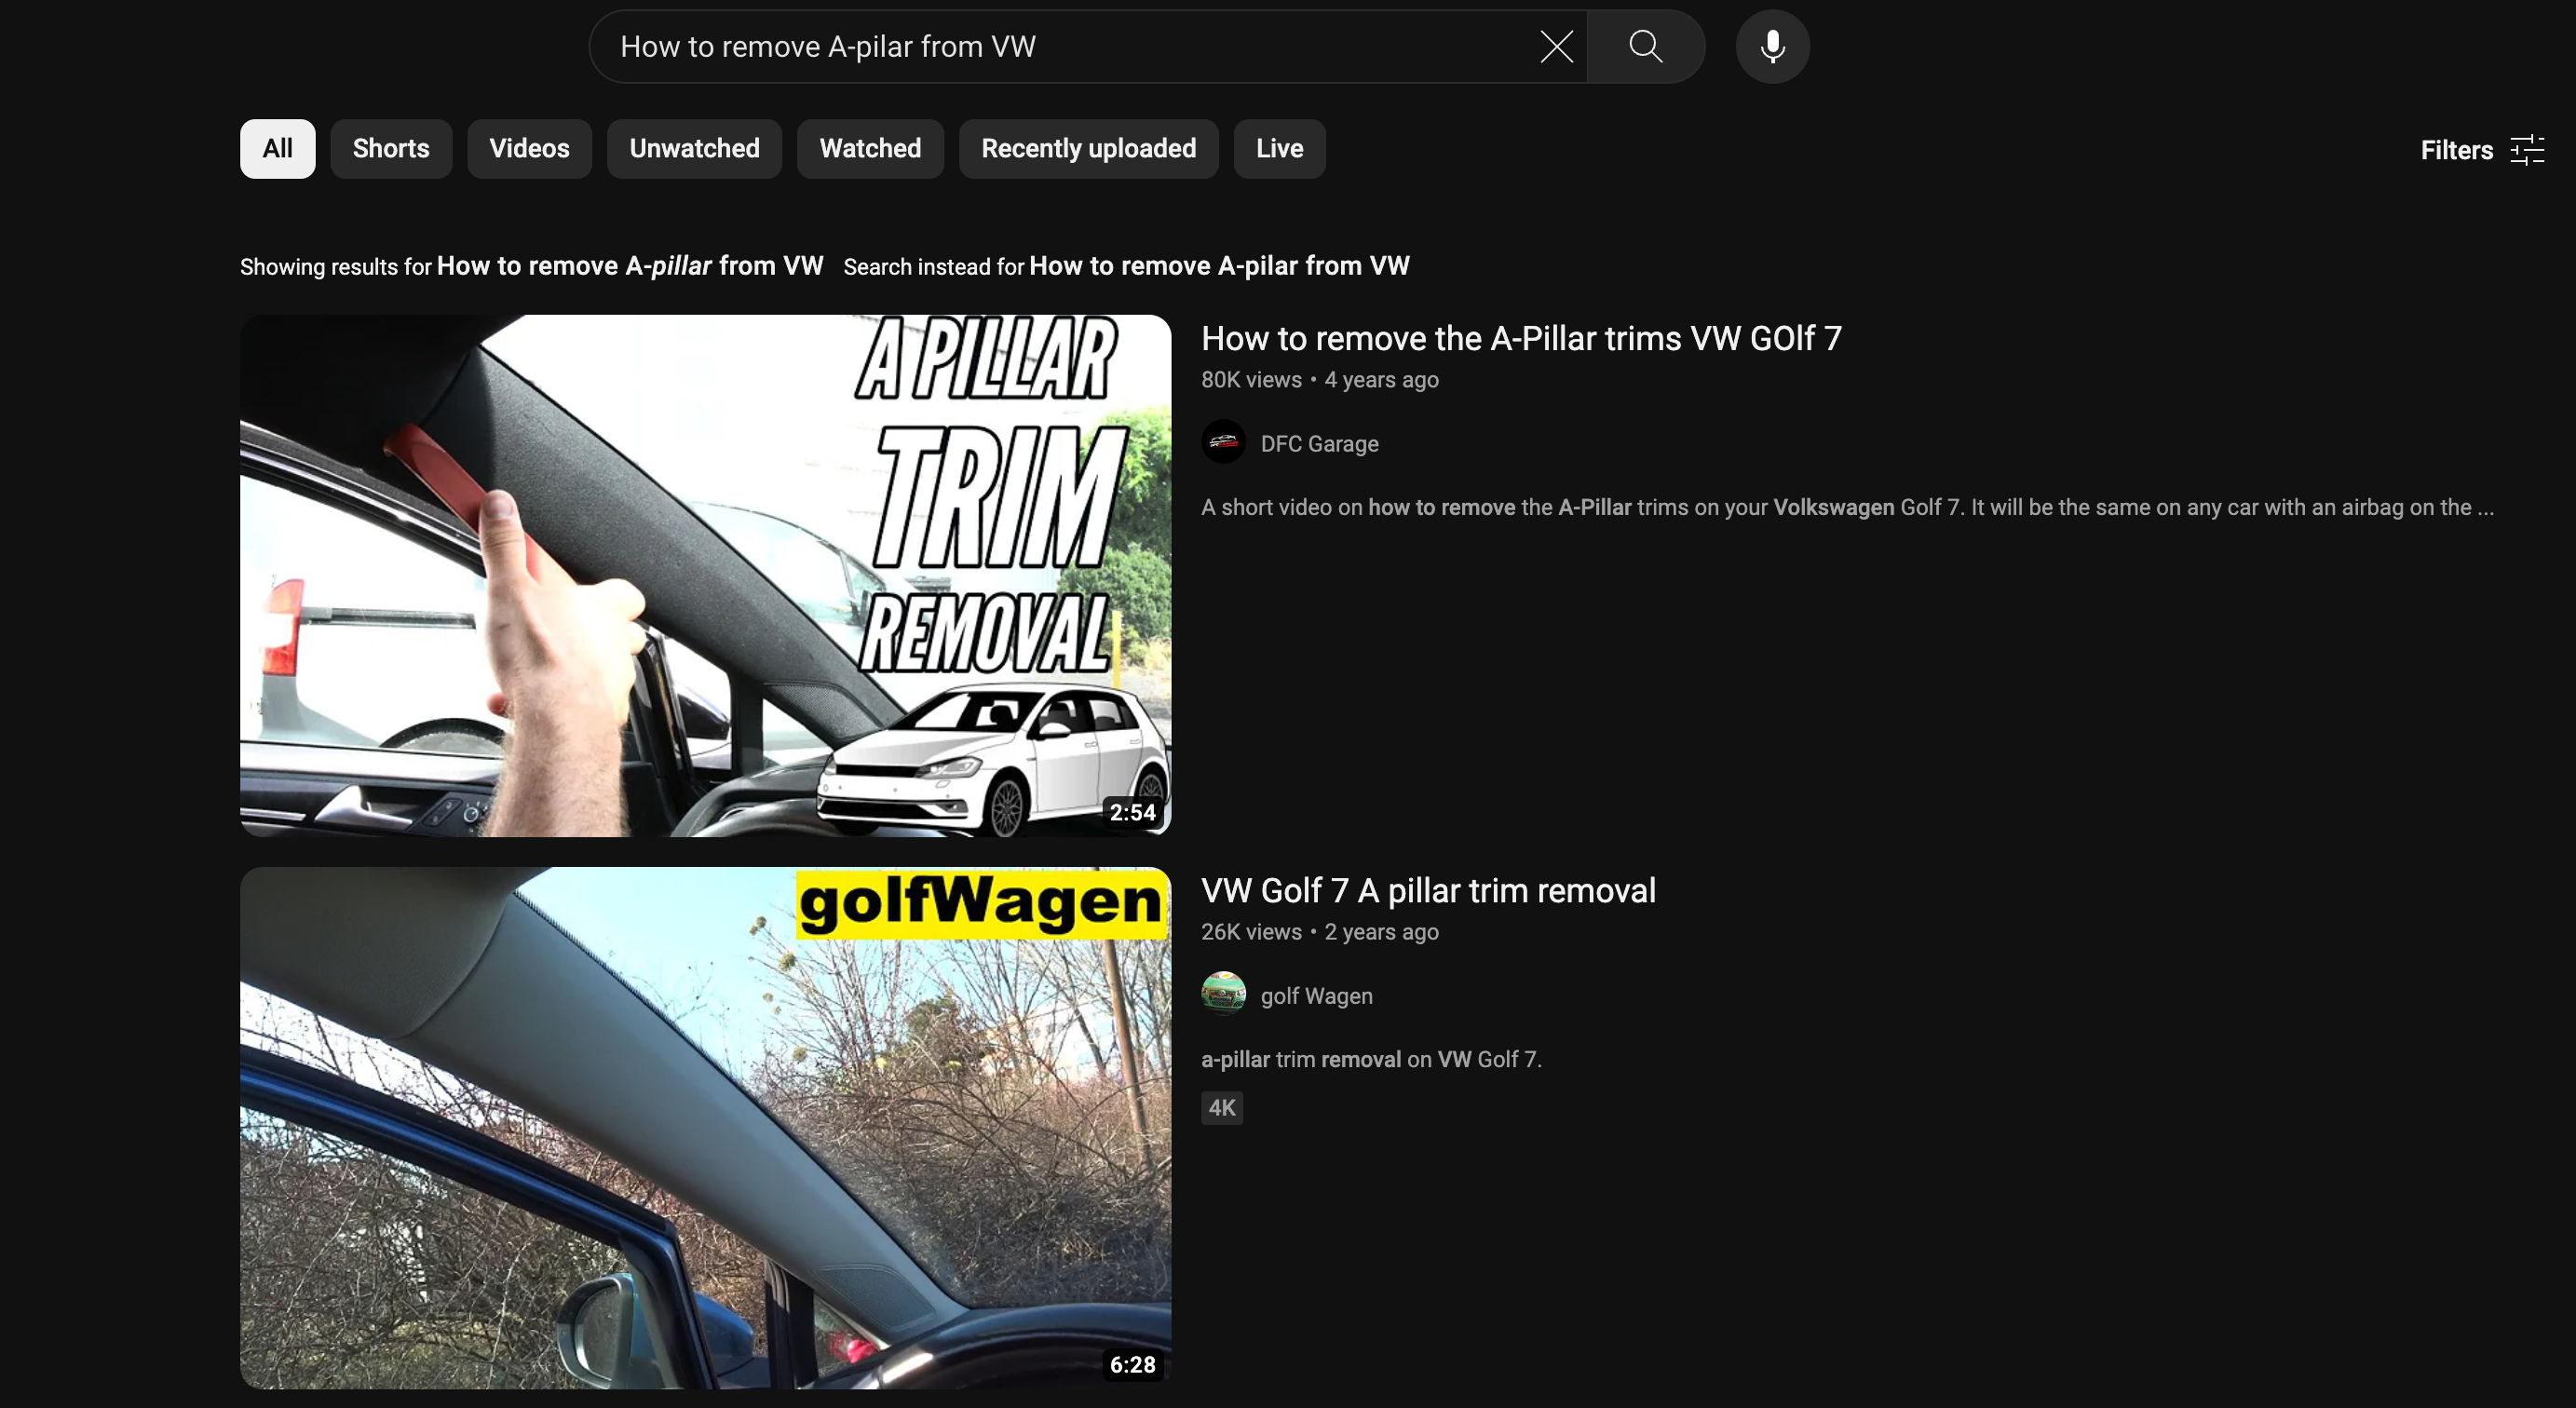
Look up "How to remove the a-pillar for [Insert Car model]".
Things you will need to remove A-pillar
- Trim removal tools
- Flathead screwdriver (ideally with a 8in+ neck
- Zip ties (to get cables to stay in place)
- Patience
Example wire route
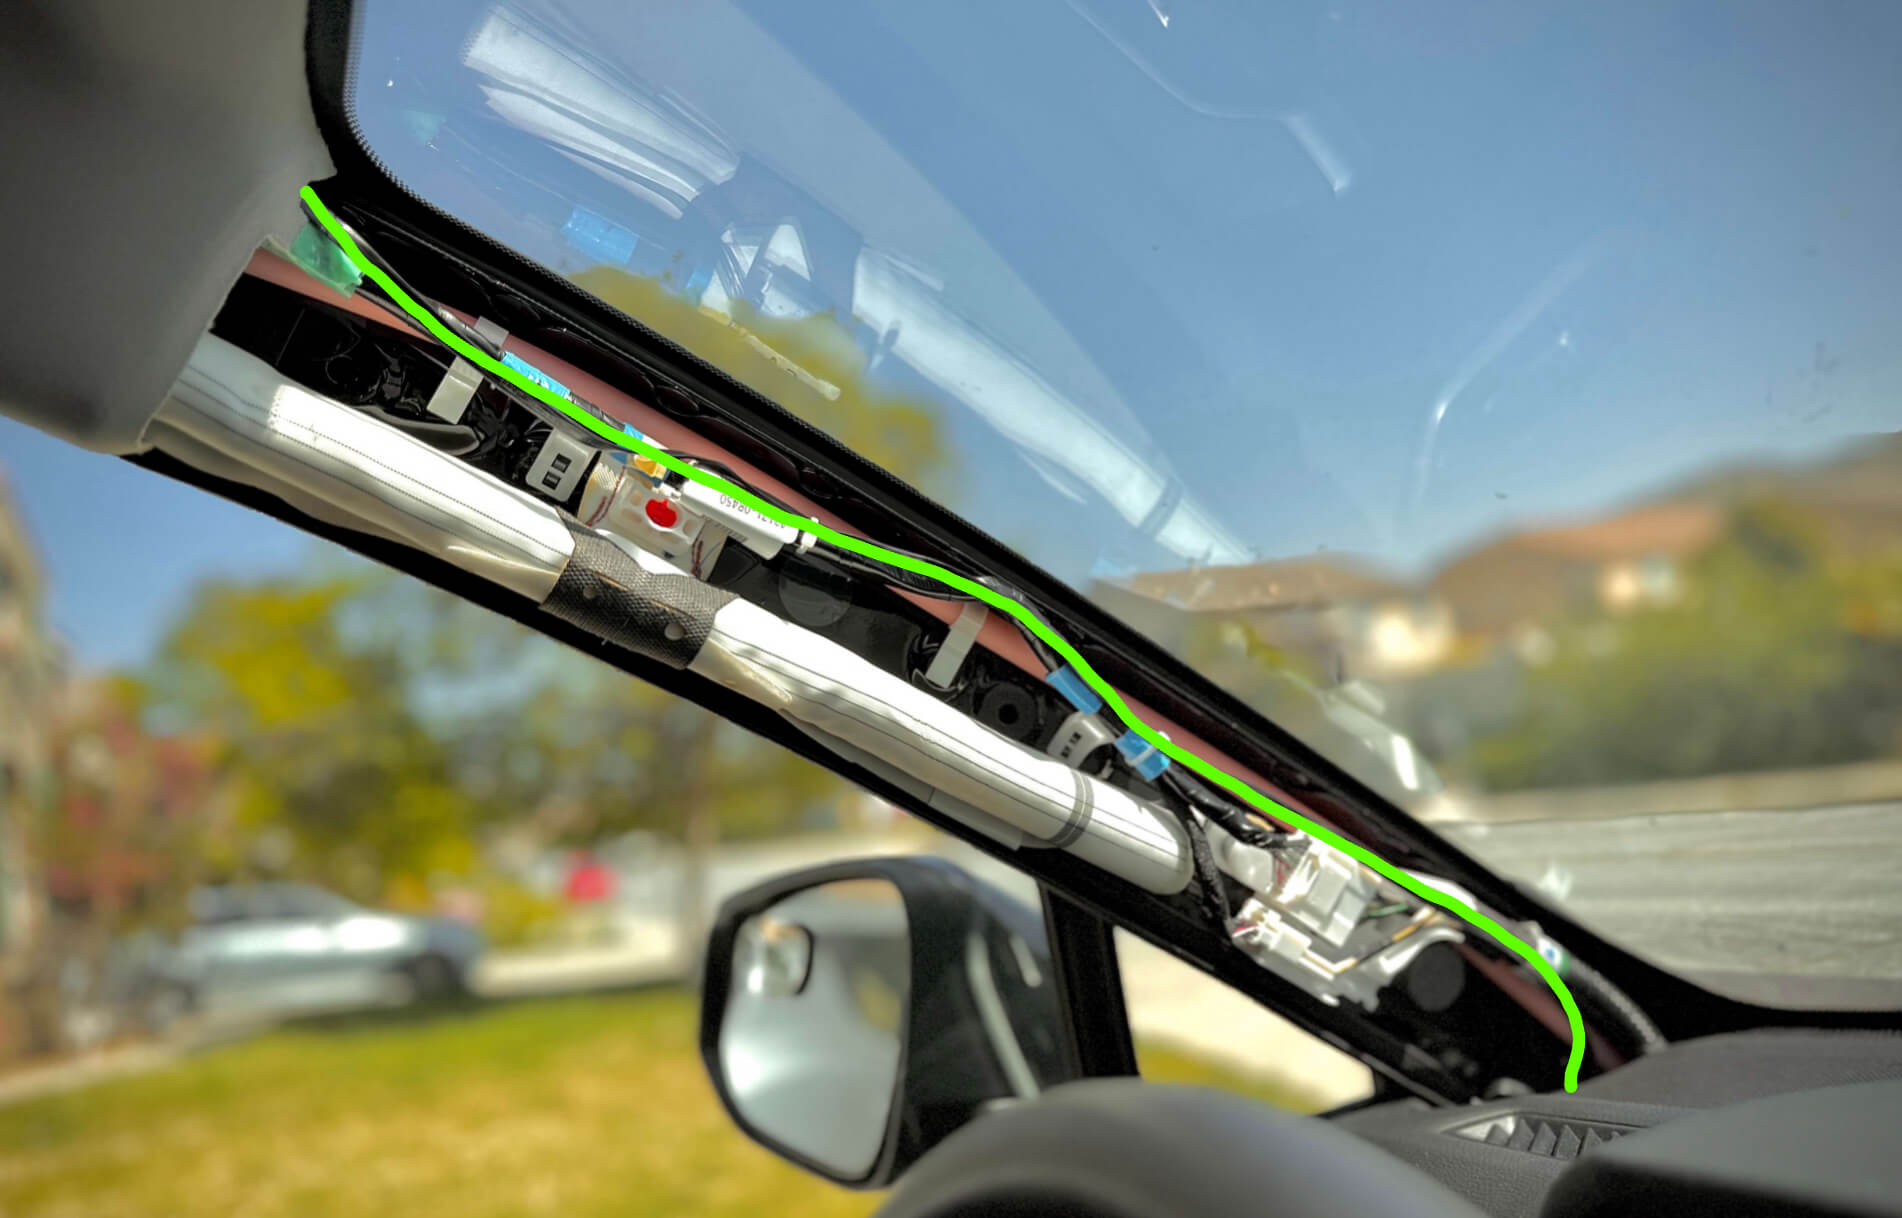
Have the wire you are routing go through a similar path as the factory wire in the A-pillar. The green line in the picture above shows an example route that stays away from the airbag. Use zip ties to ensure the cable you are routing stays in place. AVOID going on top of the airbag, or in the path of the deployment of the airbag.
Still confused?
If anything looks wildly different, and you start to panic. Breathe, and ask some questions on Discord in the appropriate channel. Many people there went through the same process you did and can help with the hurdles you've encountered. Be sure to read Search Before You Ask 🔗. Reading this will help you ask better questions that get more people to assist in whatever problem you may have during the installation.
Ready to go back to the guide?
Choose the install guide you were following