Mount Installation
⚠️ This wiki is community-maintained. The wiki should NOT be considered "word of comma". Edit suggestions are welcome and encouraged!
For a comma video walkthrough of a normal install click here.
Community Tips
For a smoother installation, refer to the tips below from the community
-
Don't be scared! openpilot is tolerant of small abnormalities in the mounting. If you can hang a picture you can do this.
-
One suggestion has been to affix a string to the outside of the windshield to denote the center line of the windshield, to make mounting setup easier
](https://files.readme.io/fcc03ac-Screenshot_2024-04-19_at_8.28.21_PM.png)
Source: Discord
-
Whiteboard markers can be used to mark your test fit location. Be sure none of the marker material will be covered by the adhesive.
-
Masking tape on the outer windshield can also help mark the location of the mount.
](https://files.readme.io/1414767-Screenshot_2024-04-19_at_8.28.12_PM.png)
Source: Discord
- It is best to test the fit of the various components before permanently affixing them. Check to make sure that all cords will reach and that covers can be replaced. Ensure there is enough space between the mount and the mirror that you will be able to remove the device from the mount. Also, make sure the mount will not interfere with the removal of any cover around your rear-view mirror.
- The main comma mount should be affixed in the center of the windshield below the rear-view mirror attachment even though this will cause the road-facing camera to be slightly off-center. openpilot has a calibration process that will adjust for this slight shift. Mounting the camera on the center line of the car will help to prevent issues with the driver-facing camera properly seeing the driver.
- Be sure to attach all cables firmly. This is one of the main installation errors. The automotive cables should all click when fully seated. The RJ45 (flat Ethernet cable) should also nicely click into both connections.
Step 1: Device Mount Prep
Process for having mount fully ready to be used is 48hrs! Any shorter will risk the strength of mount on windshield. The sooner you install mount correctly, the sooner you will be able to use the device in the car

The mount may be difficult to slide onto the device BEFORE it's installed on the windshield. This is expected and will be easier to do once the mount is installed on windshield and fully cured
- Mounting prep – Clean the mounting area with the included alcohol wipe and let it dry
- Refer to the image above for what is the top and what is the bottom of the mount
Step 2: Positioning the Mount

Ensure the top of the mount is fully visible from the driver's seat.
Step 3: Sticking Mount to Windshield
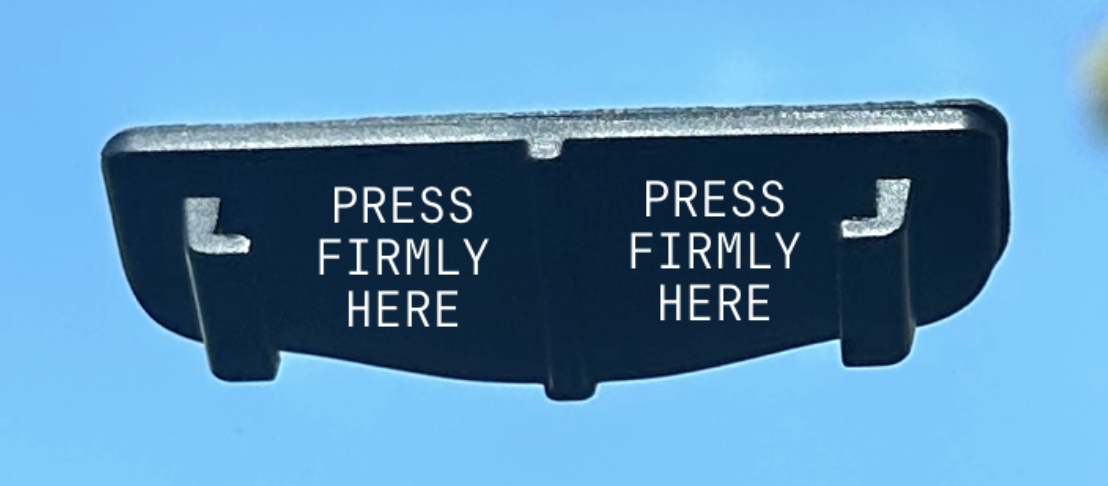
Adhere mount – Peel off the 3M tape's cover on the mount. Press firmly in the center of the mount, then the edges. Ensure no bubbles form.
Step 4: Mount Cure Time for Maximum Strength

Let the mount cure – The mount must cure for 48 hours before installing the comma device. Skipping this step will compromise the integrity of the mount.
Some force may be necessary to initially slide the device on the mount. Before applying any force, ensure the device's mount is parallel to the mount on the windshield