User Interface Walkthrough
This explains the different icons, buttons that will be found when using openpilot
⚠️ This wiki is community-maintained. The wiki should NOT be considered "word of comma". Edit suggestions are welcome and encouraged!
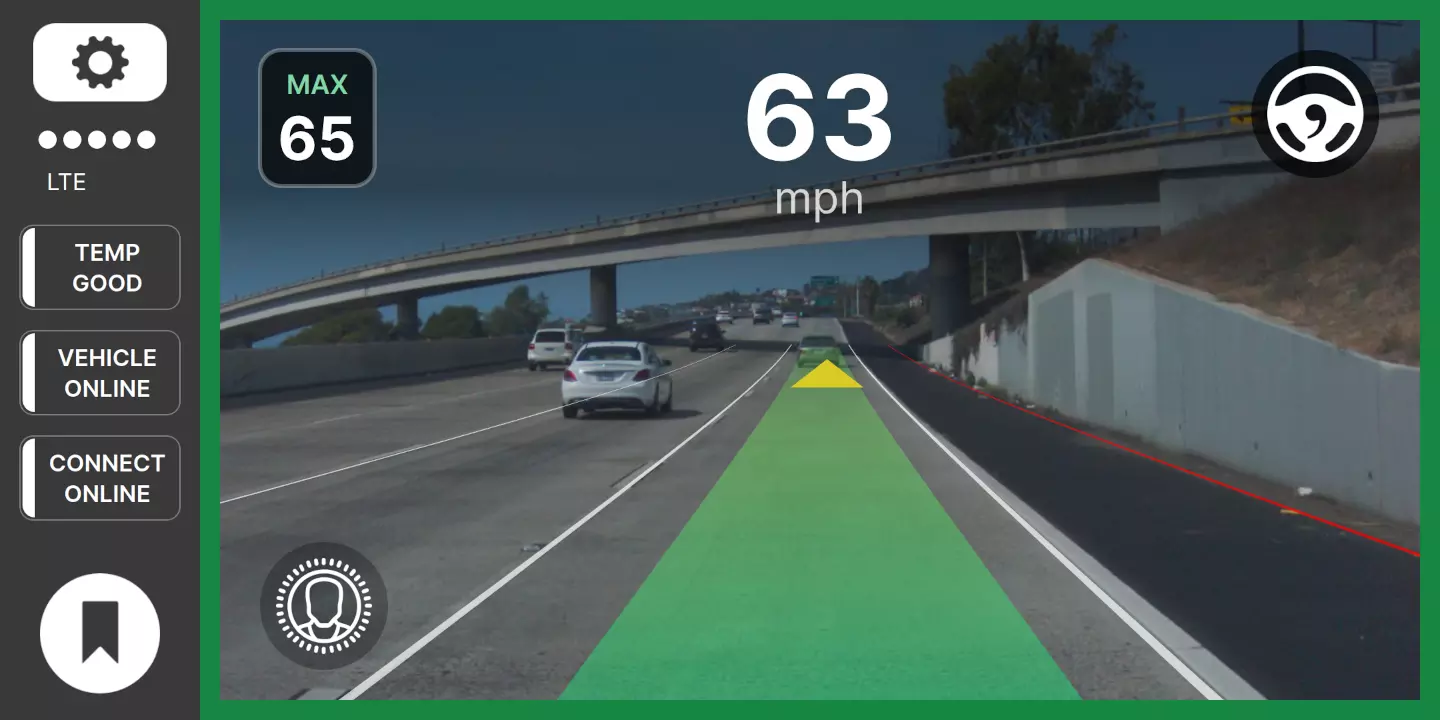
Default UI Once You Start Driving
To see the UI below you must engage openpilot. If openpilot is not engaged, you will still see the default UI, but without the green border. On the steering wheel, enable the stock cruise control system for your car to engage openpilot. After engaging openpilot you will see a green outer border and hear the sound below.
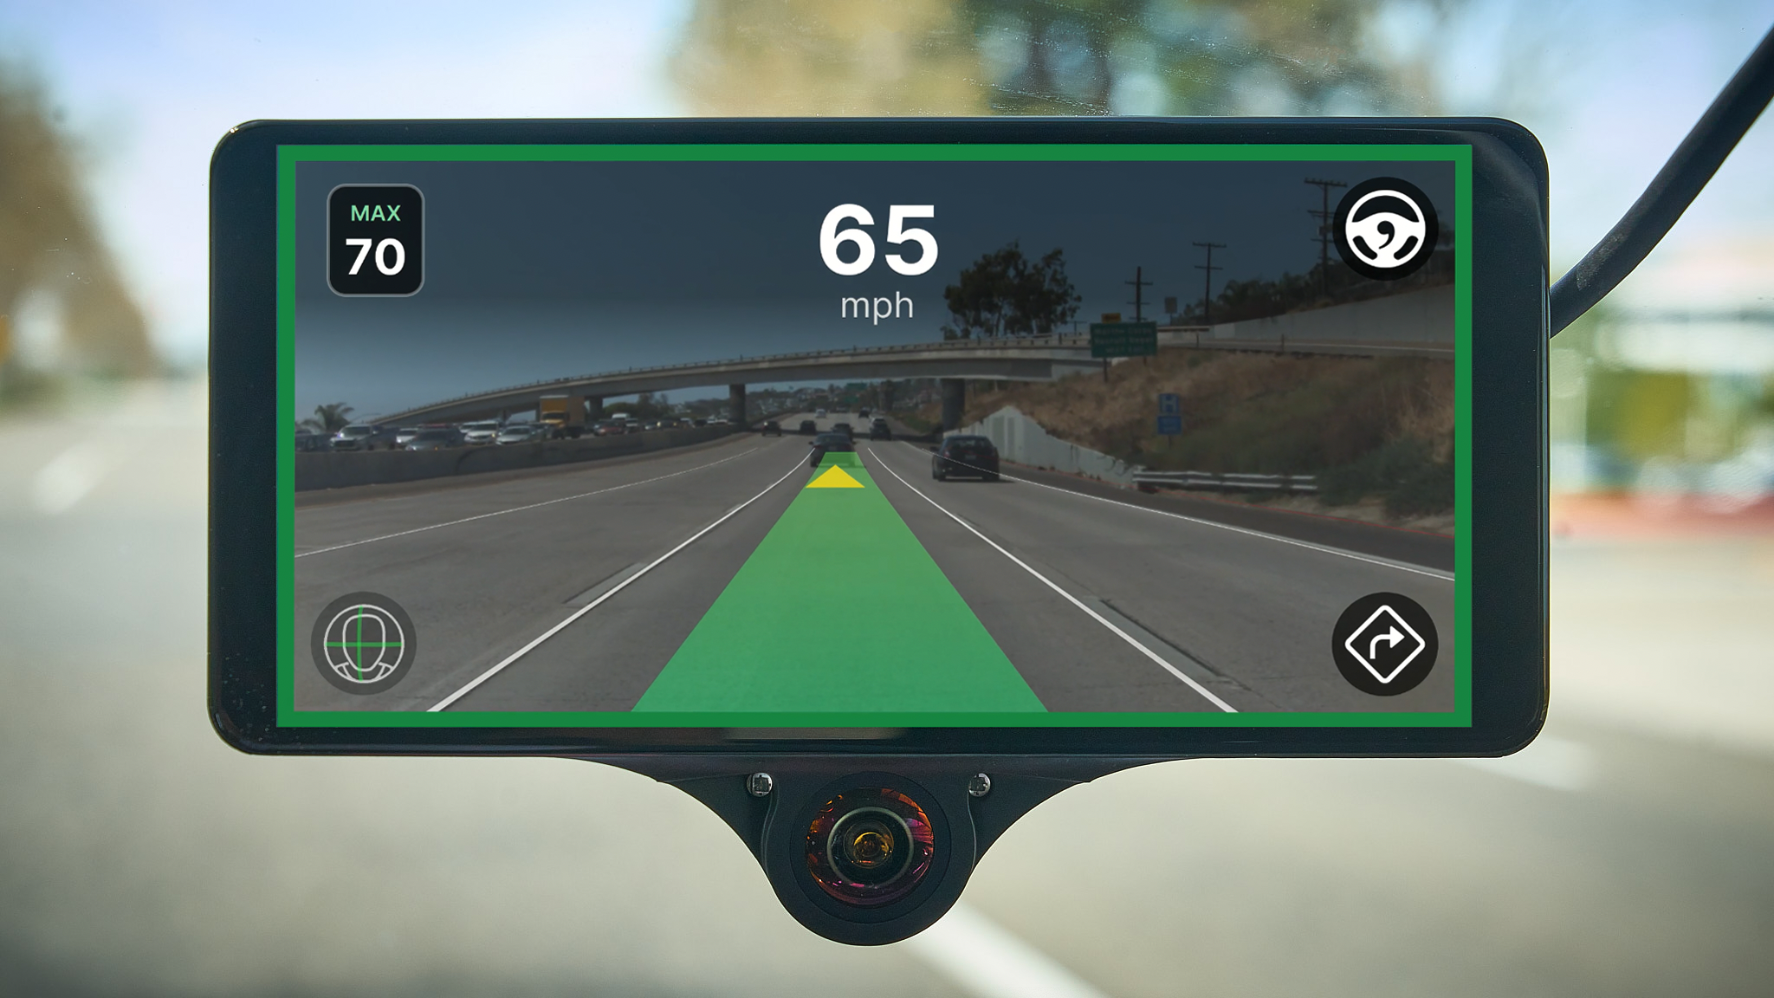
Default UI once openpilot is engaged while driving
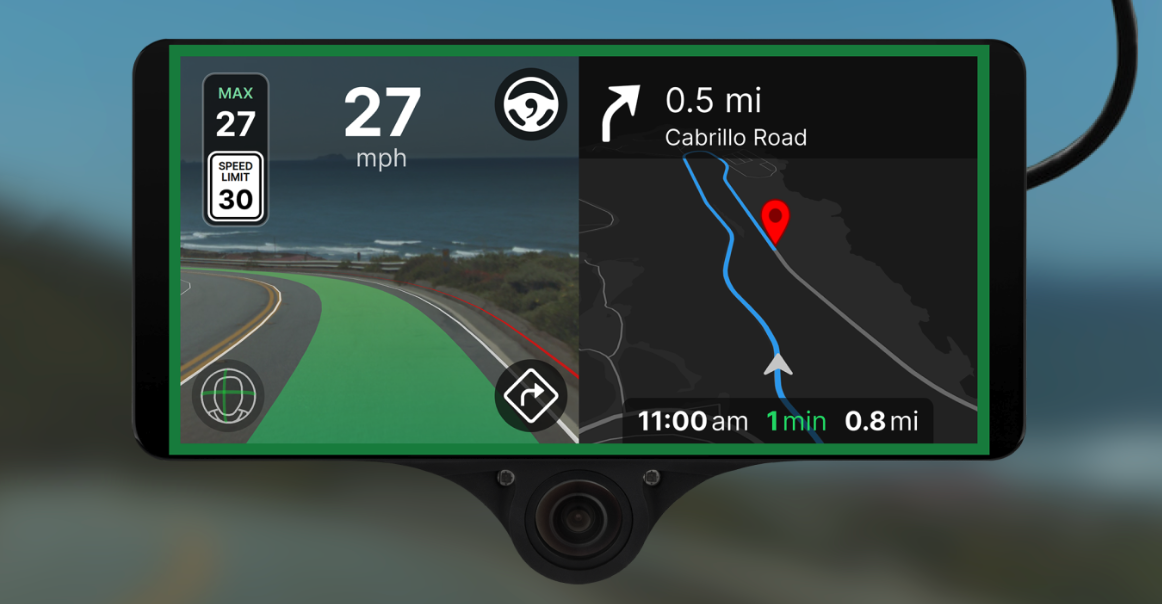
UI when using navigation
Green Border Around Screen
Border color indicates openpilot engagement status. If the border is grey openpilot is not engaged. Only when there's a green border around the perimeter is openpilot engaged. If there is any steering override the border will turn grey while openpilot is engaged. (Source: blog.comma.ai, and blog.comma.ai)
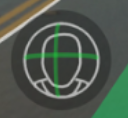
You Will See This Icon If Chill Mode Is Active

This steering wheel with a comma inside of it will typically appear in the top right corner of the screen when there is no navigation, and in the top right corner of the left half if there is navigation, as shown in the UI below.
What Happens When You Tap the Steering Wheel Icon?
Tapping on the icon will switch from Chill Mode to Experimental Mode.
What is Experimental Mode?
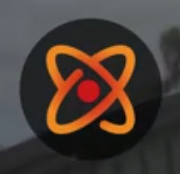
Experimental Mode Icon
This mode enables alpha-level features that aren't ready for chill mode. Experimental features are listed below:
End-to-End Longitudinal Control: Let the driving model control the gas and brakes. openpilot will drive as it thinks a human would, including stopping for red lights and stop signs. Since the driving model decides the speed to drive, the set speed will only act as an upper bound. This is an alpha quality feature; mistakes should be expected.
Navigate on openpilot: When navigation has a destination, openpilot will input the map information into the model. This provides useful context for the model and allows openpilot to keep left or right appropriately at forks/exits. Lane change behavior is unchanged and still activated by the driver. This is an alpha quality feature; mistakes should be expected, particularly around exits and forks. These mistakes can include unintended lane line crossings, late exit taking, driving towards dividing barriers in the gore areas, etc.
New Driving Visualization: The driving visualization will transition to the road-facing wide-angle camera at low speeds to better show some turns. The Experimental mode logo will also be shown in the top right corner. When a navigation destination is set and the driving model is using it as input, the driving path on the map will turn green.
How to Know When Navigate on openpilot is Active?
The route path on the map changes from blue to green and map is forced open as seen in the video below. Video below is toggling navigate on openpilot using Experimental mode button. (Source: blog.comma.ai)
New Driving Visualization on Experimental Mode
The path visualization has been updated to show the desired acceleration at every step of the planned path as a color gradient. This extra communication allows for a much more intuitive understanding of what the model intends to do in the future. (Source: blog.comma.ai)
What is Driver Monitoring?
It is a system that uses infrared sensors and/or cameras to monitor driver attentiveness. It is important for openpilot to confirm the driver is always ready to take over control of the car when needed. It also can monitor the driver’s attention level and alert an inattentive driver accordingly.
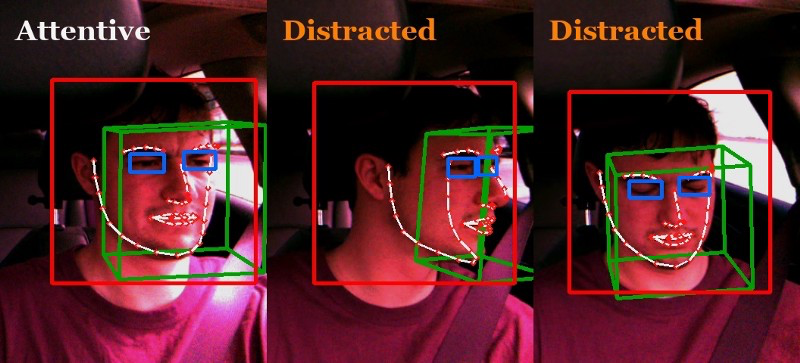
Ground truth labels for driver monitoring.
Like the planning model, the driver monitoring neural network is vision-based and trained on video footage from openpilot users who decide to upload it. This video is also annotated with automatically generated ground truth using a combination of open-source and custom neural networks. (Source: blog.comma.ai)
The Driver Monitoring (DM) system alerts the driver when distracted or asleep. However, even with an attentive driver, we must make further efforts for the system to be safe. We have designed openpilot with two other safety considerations: (Source: comma.ai/support)
- The driver must always be capable to immediately retake manual control of the vehicle, by stepping on either pedal or by pressing the cancel button.
- The vehicle must not alter its trajectory too quickly for the driver to safely react. This means that while the system is engaged, the actuators are constrained to operate within reasonable limits.
Driver Monitoring(DM) Icon
In the bottom left corner of the comma3X screen, you will see the icon(also referred as "DMoji"). When DM is active and sees your face, it will move with your face as seen in the video. When DM is not working, the icon will be greyed out and will not have moving green lines. It will be static until it finds your face again.
Driver monitoring icon shows 3D facial movement using the real-time pose output from the DM model (#27070). This helps to increase transparency of the working state of the system, as well as better communicate the presence of it. (Source: blog.comma.ai)
Lead Car Indicator
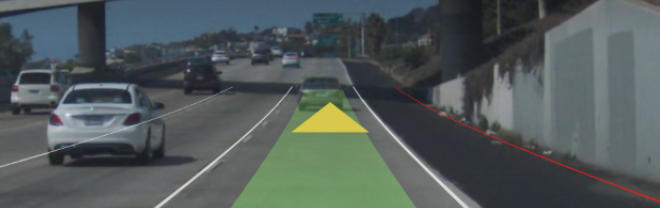
The lead car indicator is displayed as a triangle under the lead car. openpilot can detect 2 cars simultaneously. The second triangle will appear when a cut-in is detected. If no triangle is present, your car may be using its stock ACC system, and some openpilot features may not be available. (Source: step4.png)
Different Lines in UI
Green Path Indicator: Currently, the green path shows "where the model wants to be" and does not affect driving. The significance of the path may change in future updates. (Source: Discord)
White Lines: This marks where the lanes are. openpilot does not use lane lines to drive anymore. openpilot now drives like it thinks a human would. (Source: blog.comma.ai)
Red Lines: This marks the edge of the road and shows where openpilot would not go (Source: Discord)
Navigation Icon
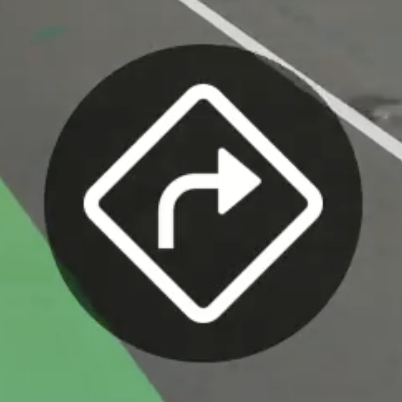
Navigation Icon
Found in the bottom right of the screen once you are on the default UI layout once you start driving. Tapping the navigation icon will take you to a split-view UI showing both the navigation's recent destinations and the default UI when driving. Setting the destination can also be done through the phone using comma connect.
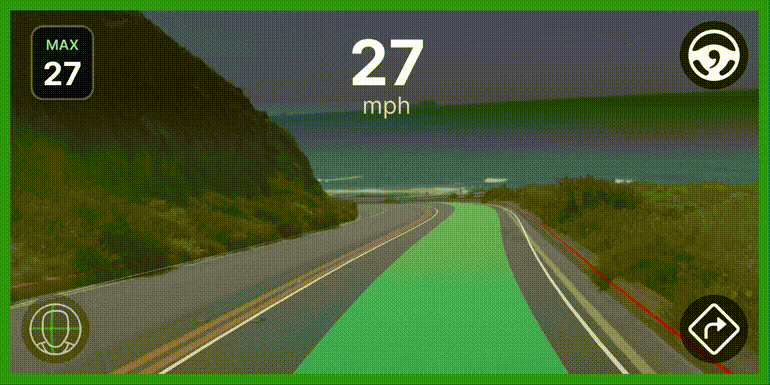
Max Speed Icon
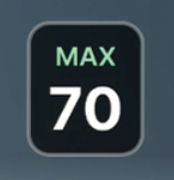
You can adjust your maximum speed by pressing + or - on your vehicle's cruise control inputs. The max speed is shown in the upper left corner of the display.
Sidebar
To find the left sidebar while driving tap anywhere on the screen and different layouts will cycle. Tap 2 times for the sidebar to pop up. The sidebar will give you access to settings, statuses, and the bookmark button.
Settings
The settings button is found in the sidebar in the top right. The best way to understand what's in the settings is to open it up and click on the different items to expand the details as shown below.
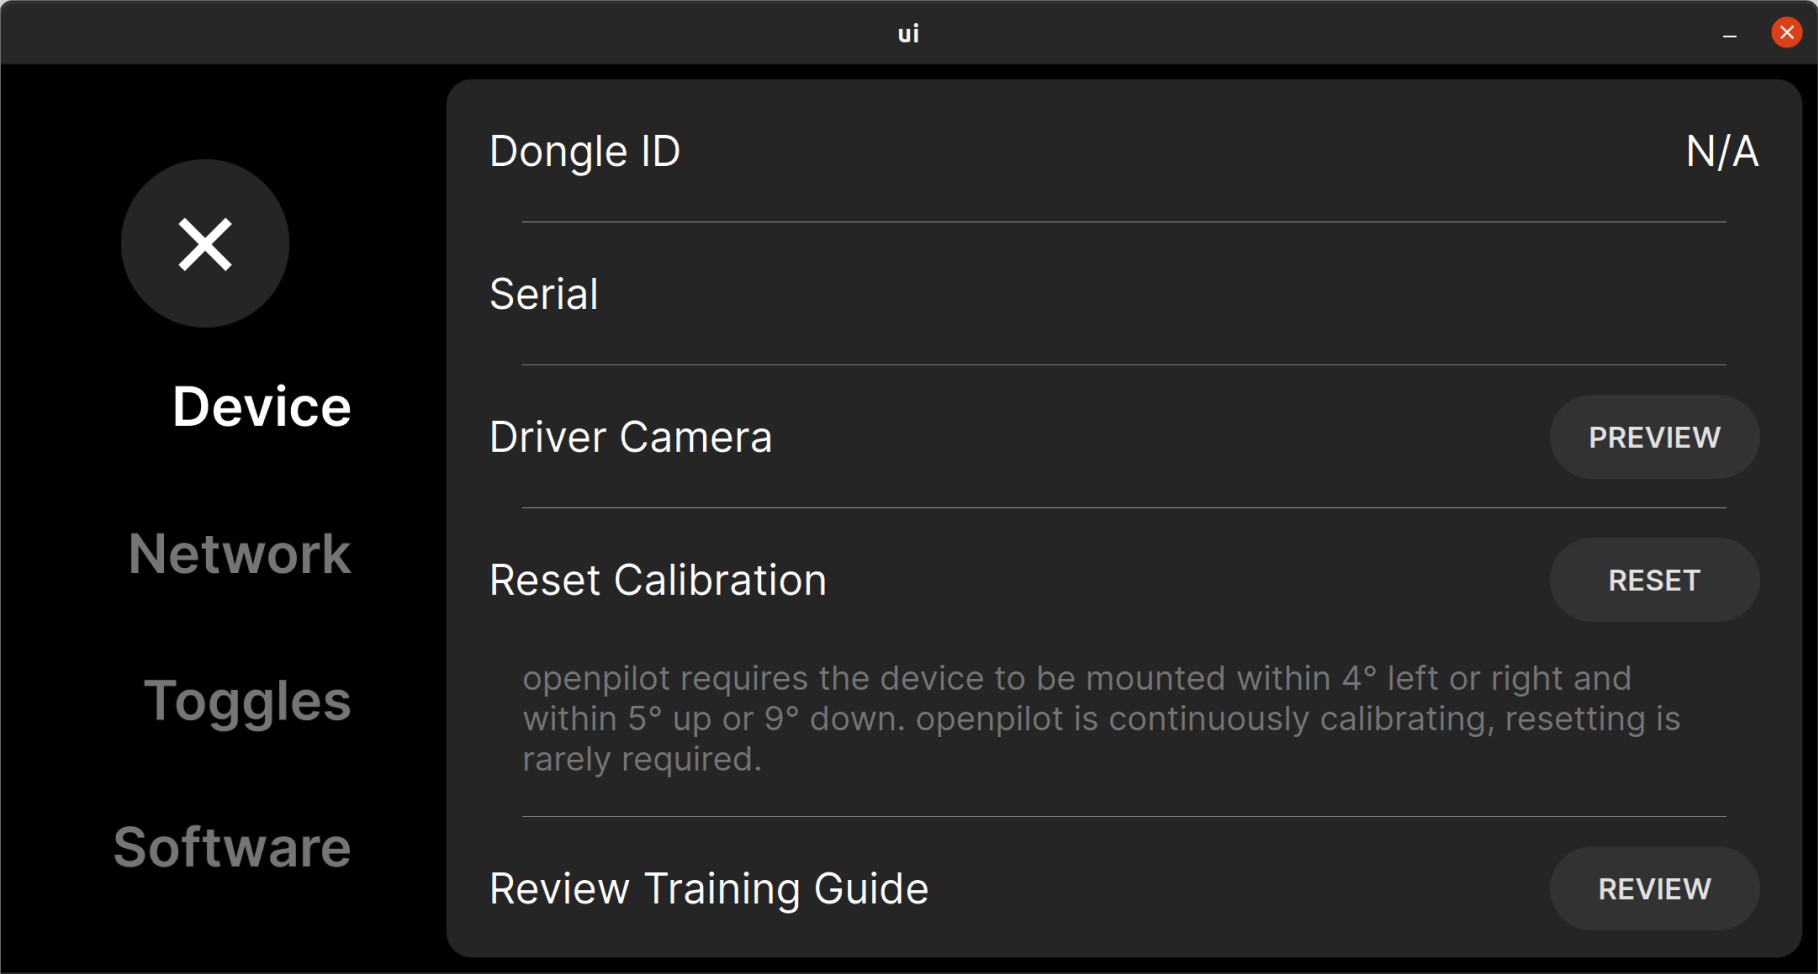
Setting menu item expanded to show details
Statuses
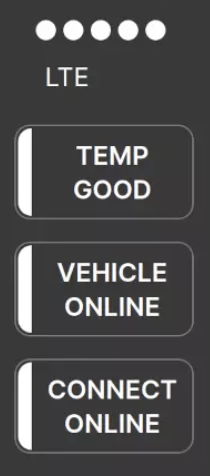
Internet Status: Strength of current reception
TEMP GOOD: This shows the device temp. If it gets too hot there will be a notification on the device
VEHICLE ONLINE: Means that the comma 3X is talking to the panda board (which is internal to the comma 3X). Seeing this status is a good thing. (Source: Discord)
CONNECT ONLINE: If the device is currently connected to the paired comma connect account
Bookmark Button
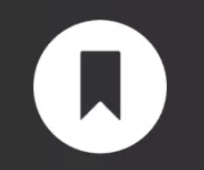
Tapping on the bookmark icon will create a bookmark that shows up as a yellow mark in the connect timeline. (#25517, #25848, #237) Currently, after clicking the bookmark button, there is no feedback other than a slight press animation in the bookmark button. The last 5 bookmarked segments are stored on the device and are not deleted when space pressure occurs. As more segments are bookmarked, the oldest bookmarked segment is deleted. The yellow lines in the example below show exactly when you bookmarked a certain part of the recorded drive.

Using the bookmark button can be helpful when you want to mark in a driving video where openpilot acted up or if there was something you wanted to look back to from the drive. People use bookmarks to help find specific parts of a drive for you to refer back to in the future. For extra-long drives, pressing the bookmark multiple times can help make the yellow mark thicker which will be easier to find. You will also notice in some drives on the connect timeline, different colors will appear in different sections of the drive. Below is a key to what the colors generally mean.
| Color | Meaning |
|---|---|
| Blue | openpilot disengaged |
| Green | openpilot engaged |
| Orange | Warning/alert (driver distracted, take control, etc.) |
| Red | Error or forced disengage |
| Yellow | Flag |
| Grey | User overriding the gas or steering |
Remember...
👍 Things openpilot Can Do:
- Determine a path to drive
- Maintain a maximum speed
- Maintain a safe distance from a lead car.
- Change lanes with driver assistance.
🚫 Things openpilot Cannot Do:
- Stay engaged while the driver is distracted.
- See other cars during a lane change.
- Stop for red lights, stop signs, or pedestrians.
- React to unsafe situations like close vehicle cut-ins or road hazards.