Car Unrecognized?
After installing openpilot software, if your comma device shows Dashcam Mode: Car Unrecognized on your device but have a supported make and model of a car, this means you will need to fingerprint your car.
](https://files.readme.io/e882155-Screenshot_2024-04-12_at_8.48.42_AM.png)
Source: Discord
Note: "Check Connections" is not the same as "Car Unrecognized"
If it says check connections, that's likely not a fingerprint issue, that is a connection issue. Check all cabling. If it says "Car Unrecognized", then you're in the right place.
What is fingerprinting?
Fingerprinting is the process of identifying the specific vehicle openpilot is connected to so openpilot can know the capabilities and characteristics of the vehicle to properly interface with its electronic control units (ECUs) and control functions like steering, acceleration, and braking.
Current methods use vehicle ECU firmware logging. openpilot will fingerprint the vehicle on each start-up. If openpilot detects a firmware version not previously logged, it will need to be added to the codebase.
Before fingerprinting try...
Switch to master-ci branch
master-ci branchYou should run and check if the latest, unstable, cutting-edge, developer master-ci branch of openpilot already has your fingerprint. If it works, you won't need to do much of this guide, the next stable release of openpilot will likely successfully identify your vehicle. To learn how to switch branches click here.
When the new version of the stable release is out switch back to the stock openpilot branch.
If switching to master-ci doesn't get your vehicle to work, move on to the next section
Fingerprinting 2.0 Instructions
Getting firmware versions with these instructions requires an official device. Users without an official device can get firmware versions by running some scripts with alternative instructions and then use the car firmware retrieved in place of the instructions for official devices.
Used for all officially supported makes such as Honda, Toyota, and is also supported for Hyundai, Volkswagen and Ford.
Step 1: Record a Drive
Ensure your comma power v2 is hooked up to your car harness. Drive around your neighborhood for a bit, then return to upload the drive on WiFi to the comma servers.
Step 2: Log into your account
Log in to the same account you paired your comma device with. Google Login / Google Login, GitHub Login / GitHub Login, Apple Login / Apple Login. Otherwise, you'll see nothing.
https://my.comma.ai/useradmin This is the link to use to get to the login page.
Step 3: Click on the most recent drive

As seen above, you will get to a page with many numbers and letters. Focus on finding the column that says route_name and click the most recent one, which should be the top one.
Step 4: Click the first segment (segment 0)

Look for the word "segments:" and right underneath it you will see a box with a number 0. Click on the neighboring box as shown in the photo above.
Finding the Firmware
Step 5: Select carParams
carParams
In the log dropdown select carParams
Step 6: Search for carFw
carFw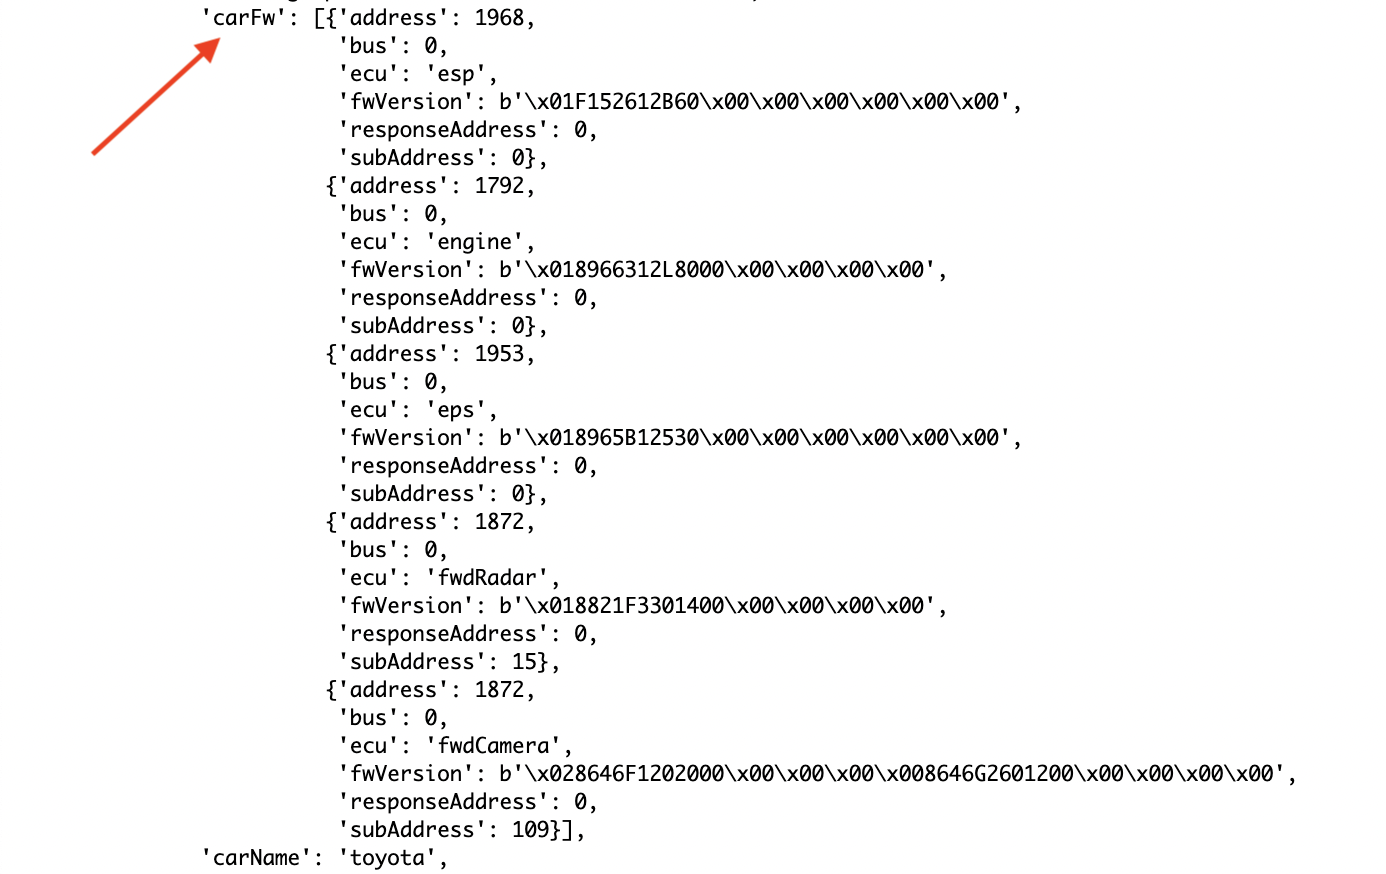
Search the page for carFw
If "carFw" is empty, please check your harness's CAT5 connection to the comma power that is on the OBD-II port. If it is still empty after another drive, then try reseating and/or flipping the USB-C/ODB-C cable between the harness and your comma device.
If the connections look good and it is still empty after yet another drive, check the fuses. If that looks good, try a known good CAT5 cable. If that looks good but the entry is still empty and it is after another drive, ask your make's Discord channel for guidance.
Step 7: Fork openpilot repo
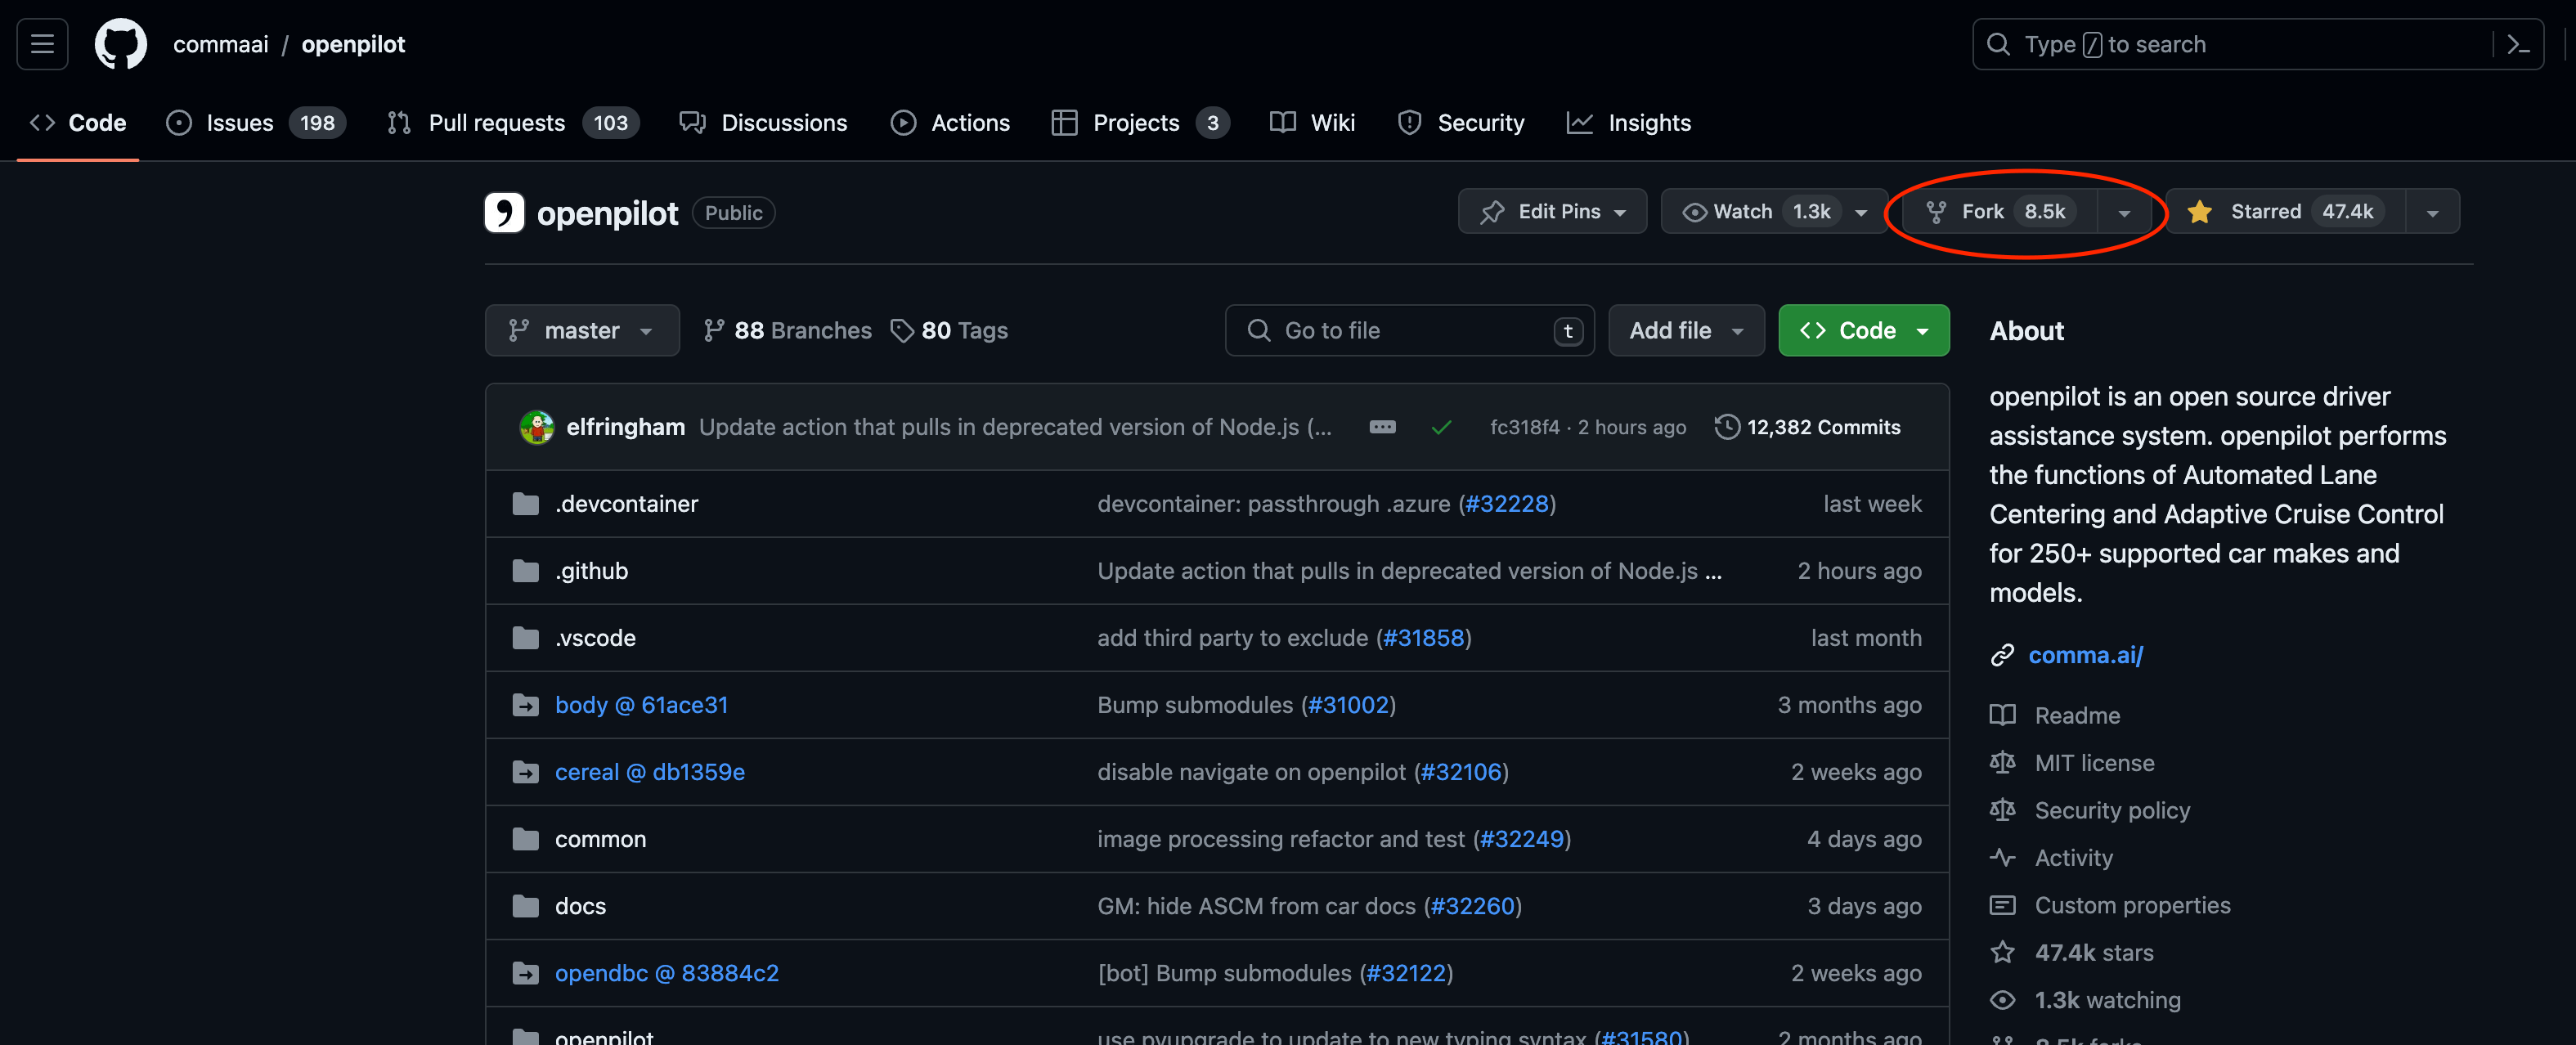
- Go to the openpilot GitHub repo.
- Fork the repo (upper right-hand corner).
- Make sure your repository name is "openpilot" which is default, don't change it.
Step 8: Browse to the folders
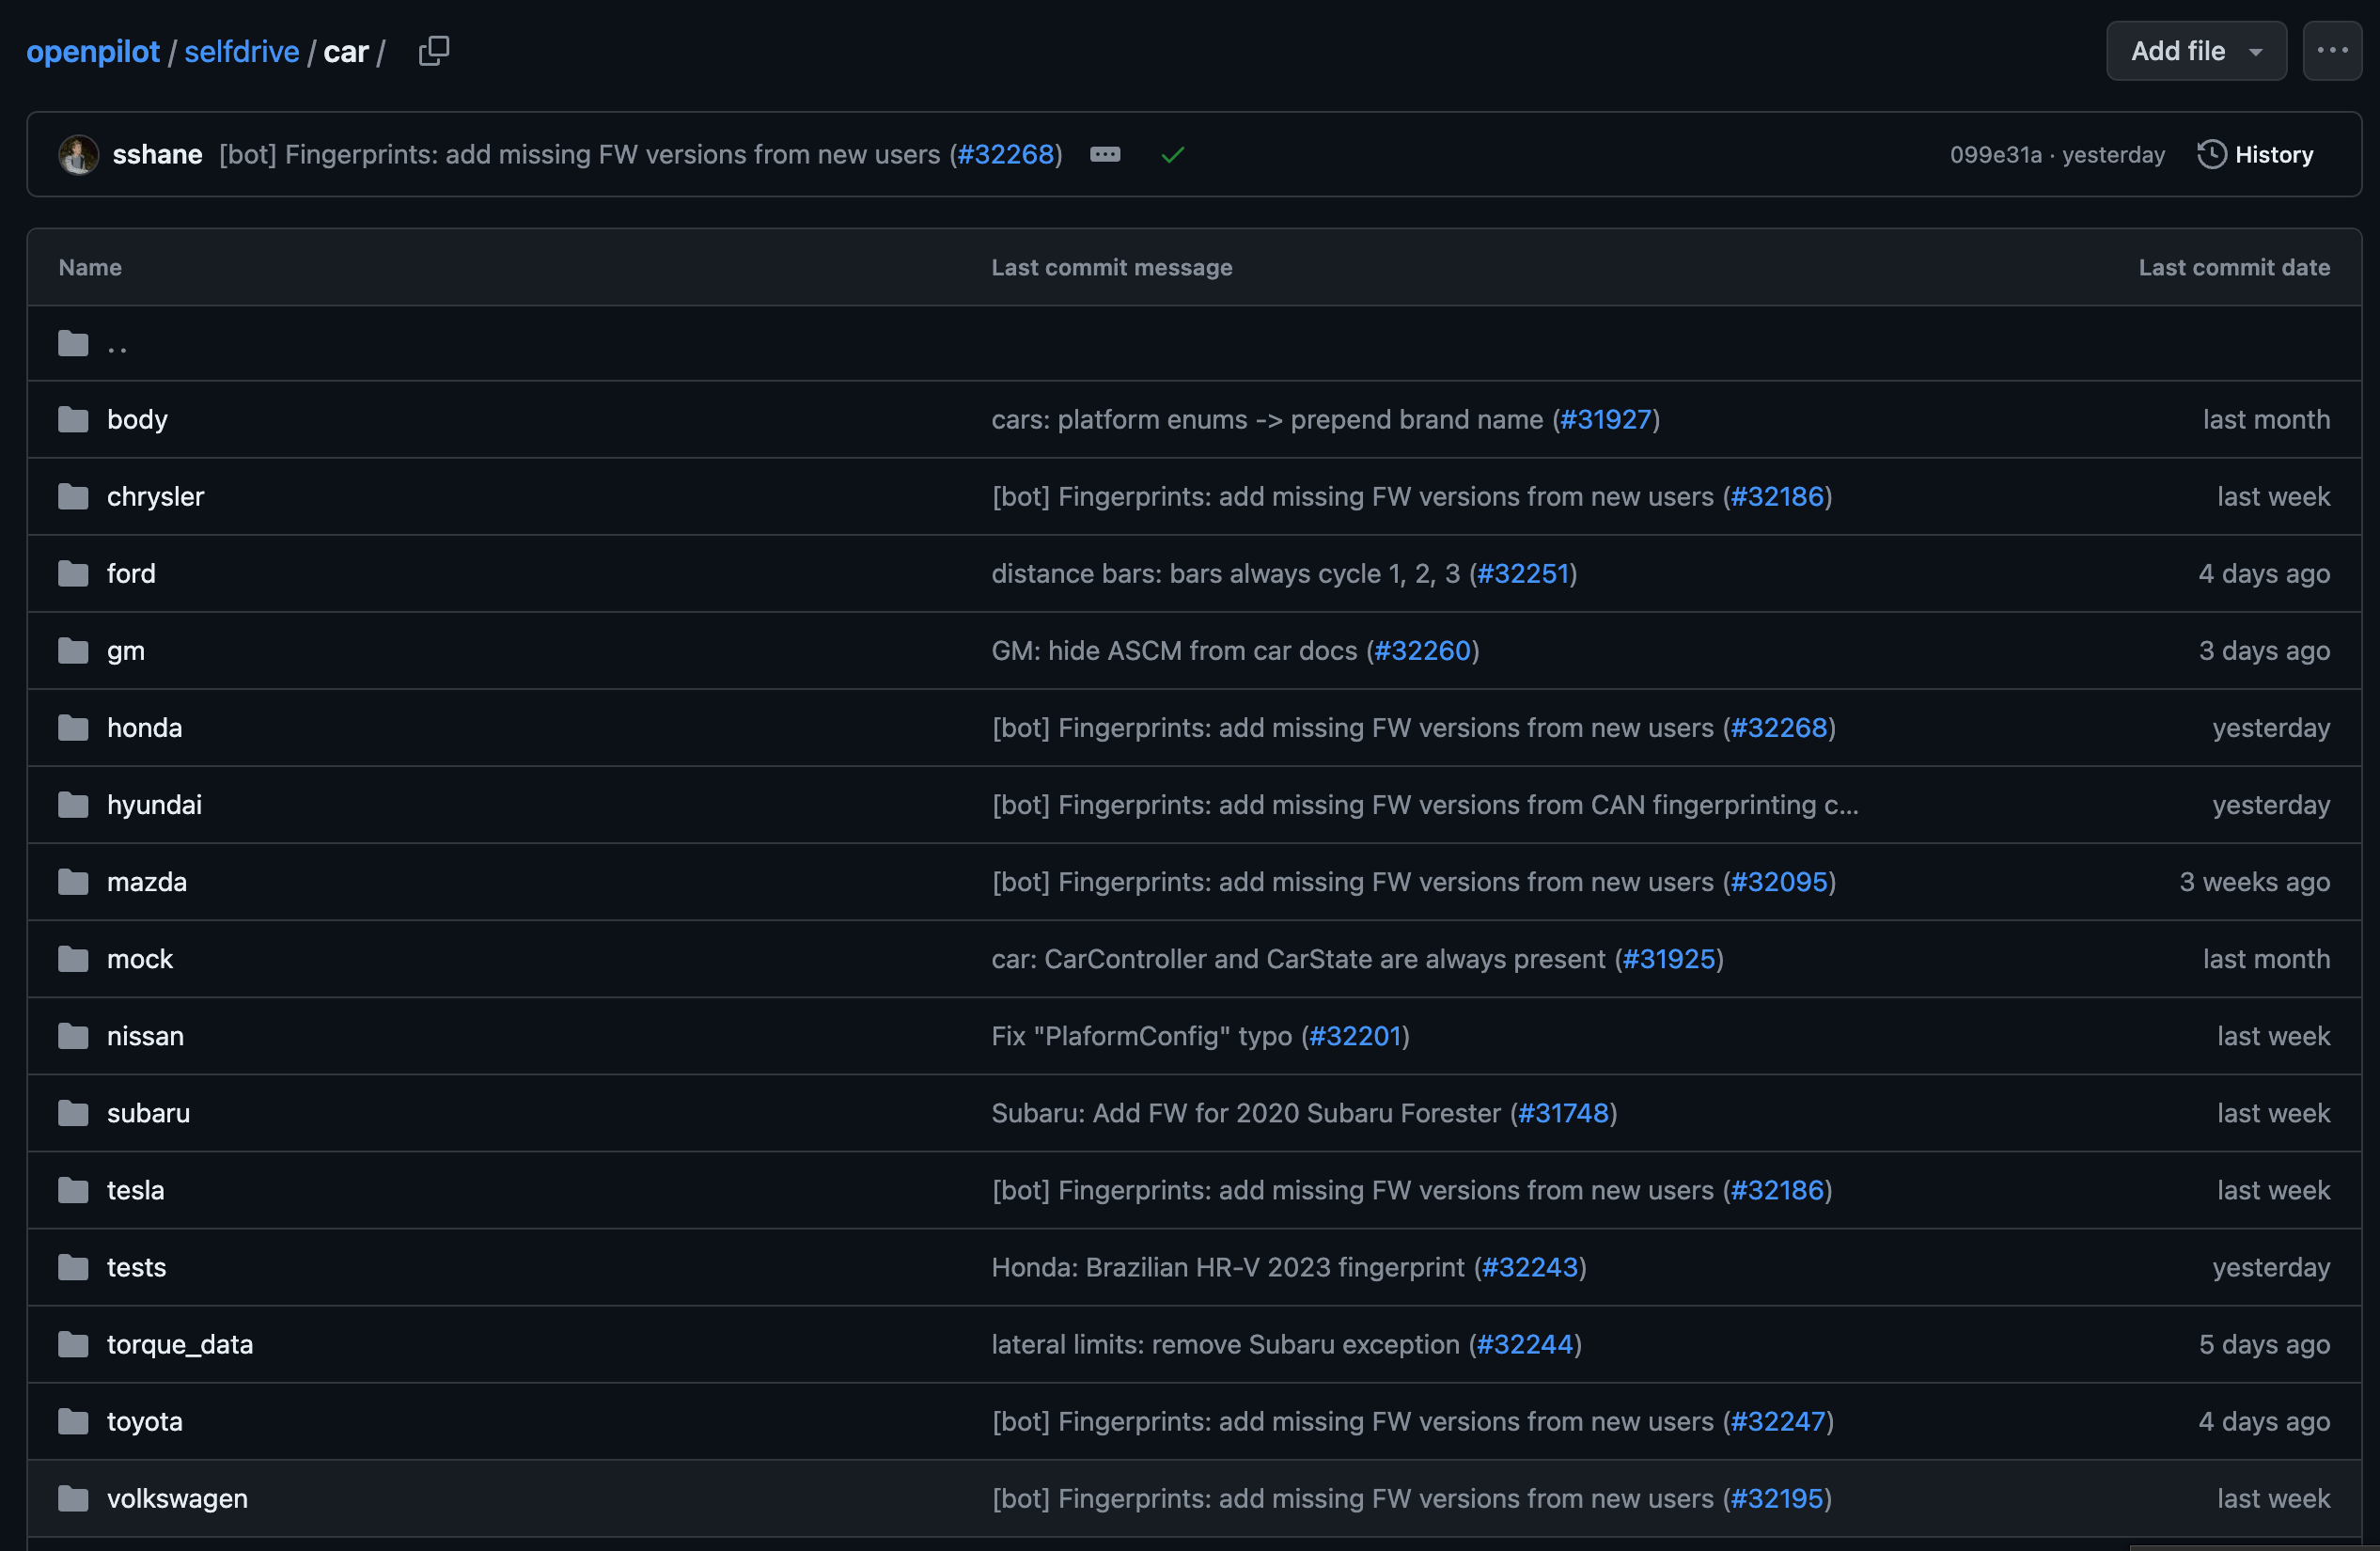
In your openpilot fork, browse to selfdrive/car/<car make>.
Once you are in your fork, find the folder selfdrive, then find the folder car, then as the photo shows above you will see different car makes. Click the company of your car.
Adding New Firmware Version
Step 9: Adding to fingerprints.py
fingerprints.pyIn your fingerprints.py file, add the firmware in this format. Use a decimal to hex converter to get the correct string to place after 0x. (If your vehicle is already listed, you can simply copy/paste the ECU firmware under the correct ECU type; the hex code will already be there)
  CAR.MODEL: {
    (Ecu.type, 0xAddress-converted-to-hex, 0xSub-address-converted-to-hex-'None'-if-0): [
      b'fwVersion',
      b'existingFirmware',
    ],
  },
Example
Here is a filled-out example for the Toyota Corolla in the case as if we wanted to add engine firmware from the example. 1792 in hex is 0x700. Add the necessary firmware to the corresponding list under the ECU type, address in hex, and subaddress if present entry.
Not necessary but ideal...
Try to add it lexicographically and make sure the list is sorted. This isn't necessary for operation but necessary if you want to upstream the fingerprints to comma.
  CAR.COROLLA_TSS2: {
    (Ecu.engine, 0x700, None): [
      b'\x01896630ZG2000\x00\x00\x00\x00',
      b'\x01896630ZG5000\x00\x00\x00\x00',
      b'\x01896630ZG5100\x00\x00\x00\x00',
      b'\x01896630ZG5200\x00\x00\x00\x00',
      b'\x01896630ZG5300\x00\x00\x00\x00',
      b'\x01896630ZP1000\x00\x00\x00\x00',
      b'\x01896630ZP2000\x00\x00\x00\x00',
      b'\x01896630ZQ5000\x00\x00\x00\x00',
      b'\x01896630ZU9000\x00\x00\x00\x00',
      b'\x01896630ZX4000\x00\x00\x00\x00',
      b'\x018966312L8000\x00\x00\x00\x00', /* <-- notice that the firmware from car params is added here. */
      b'\x018966312M0000\x00\x00\x00\x00',
      b'\x018966312M9000\x00\x00\x00\x00',
      b'\x018966312P9000\x00\x00\x00\x00',
      b'\x018966312P9100\x00\x00\x00\x00',
      b'\x018966312P9200\x00\x00\x00\x00',
      b'\x018966312P9300\x00\x00\x00\x00',
      b'\x018966312Q2300\x00\x00\x00\x00',
      b'\x018966312Q8000\x00\x00\x00\x00',
      b'\x018966312R0000\x00\x00\x00\x00',
      b'\x018966312R0100\x00\x00\x00\x00',
      b'\x018966312R1000\x00\x00\x00\x00',
      b'\x018966312R1100\x00\x00\x00\x00',
      b'\x018966312R3100\x00\x00\x00\x00',
      b'\x018966312S5000\x00\x00\x00\x00',
      b'\x018966312S7000\x00\x00\x00\x00',
      b'\x018966312W3000\x00\x00\x00\x00',
      b'\x018966312W9000\x00\x00\x00\x00',
    ],
...
Ensure that every single ECU has its firmware in this file.
Final Steps
Step 10: Commit changes & Test
- Commit your change to your repo.
- Test your changes by installing your forked openpilot branch. On the C3X device, uninstall openpilot and reinstall with the following URL with your GitHub username and branch name substituted:
https://installer.comma.ai/<your github username>/<branch name>
Note: Branch names with slashes will not work on 0.9.5 ex: bugfix/branch-name will not work. However bugfix-branch-name will work.
Step 11: Create a pull request
Once you've confirmed openpilot works, create a pull request to upstream your changes to the official openpilot code. Once your pull request has been merged, usually within a day or two, your car will be included in the next openpilot release and you'll be able to run the official code again.
Still confused?
If you need help, consult your make's channel at the comma.ai community discord. Try to at least get to Step 3 on your own though but if you can't, that's OK, go reach out. If the make's community deems it necessary to hardcode the fingerprint or you aren't getting any response on the channels, consider the Hardcoded Fingerprint comma.ai openpilot Continuous Micro-Fork Generator branches.
GitHub Community Wiki
Check out the Community Wiki for fingerprinting.