Normal Install
⚠️ This wiki is community-maintained. The wiki should NOT be considered "word of comma". Edit suggestions are welcome and encouraged!
For a comma video walkthrough of a normal install click here.
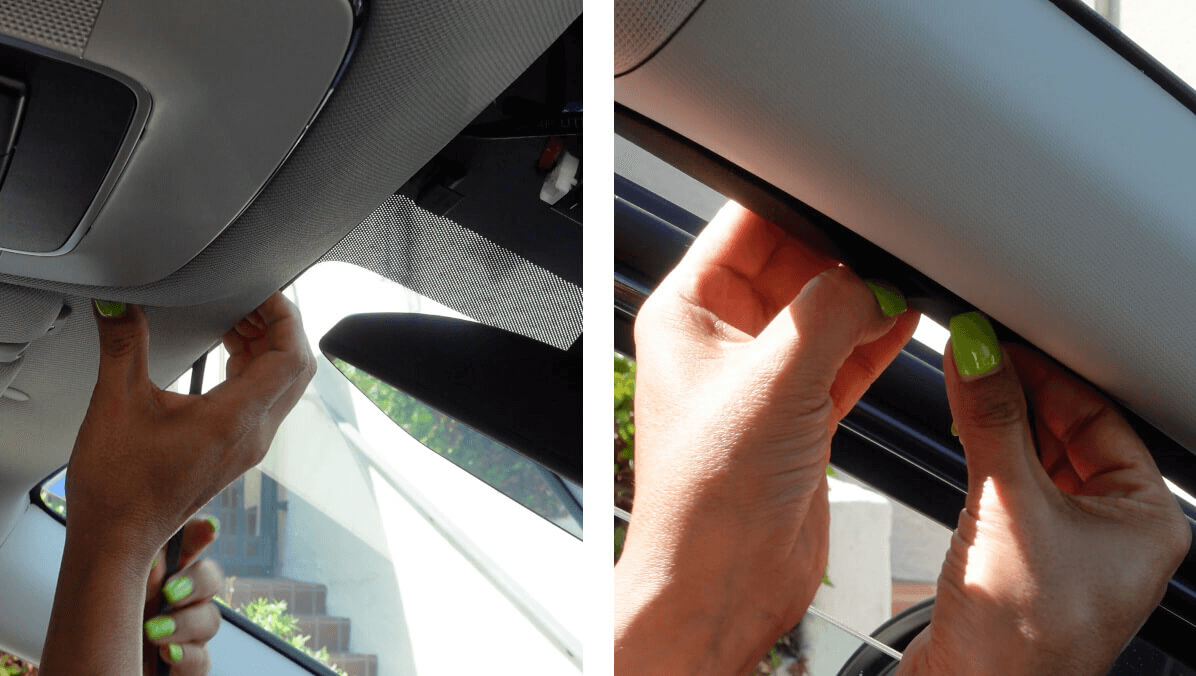
Step 1: Remove the rearview mirror cover trim
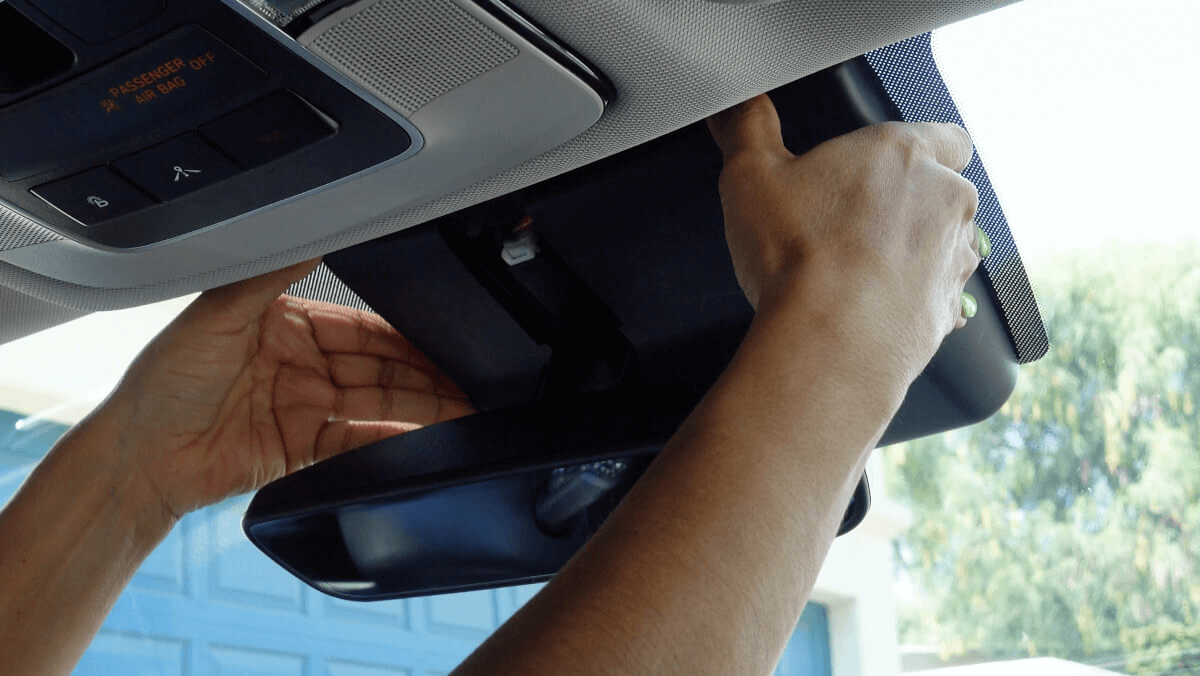
Removal method varies by car. The durable plastic often requires a strong tug to pop it off on Hondas. Toyotas often need a slide outward. If you’d like to see how it’s done, find a comma installation guide for your specific make on YouTube.
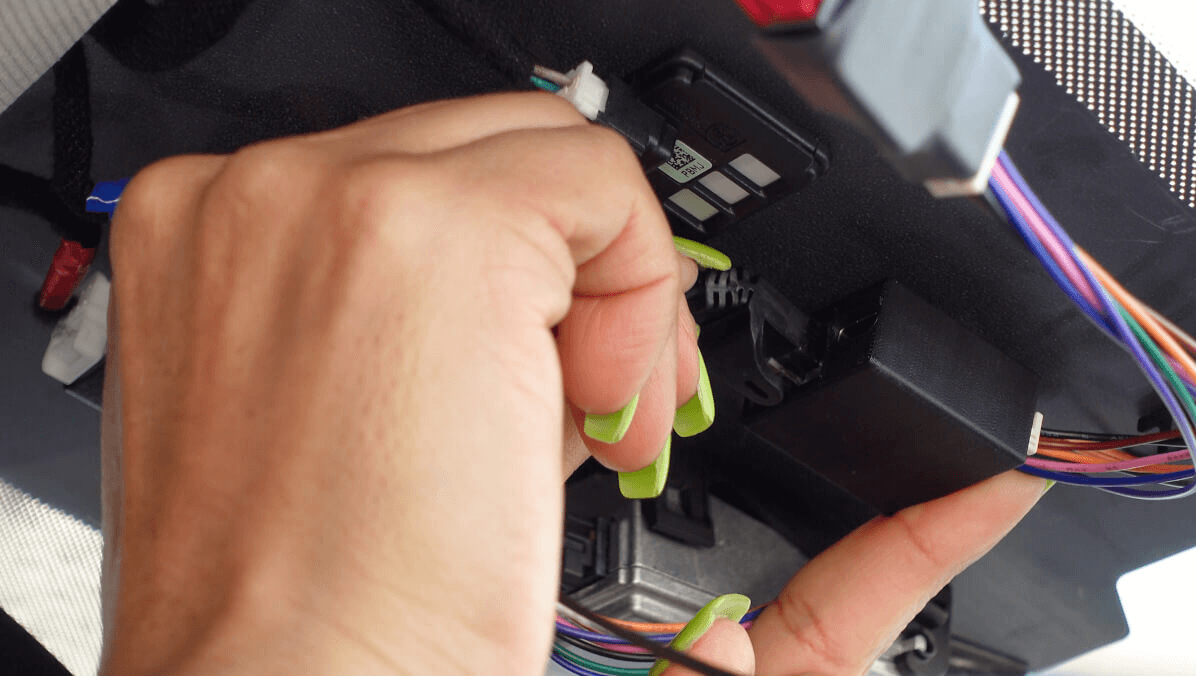
Step 2: Unplug the existing LKAS camera connector
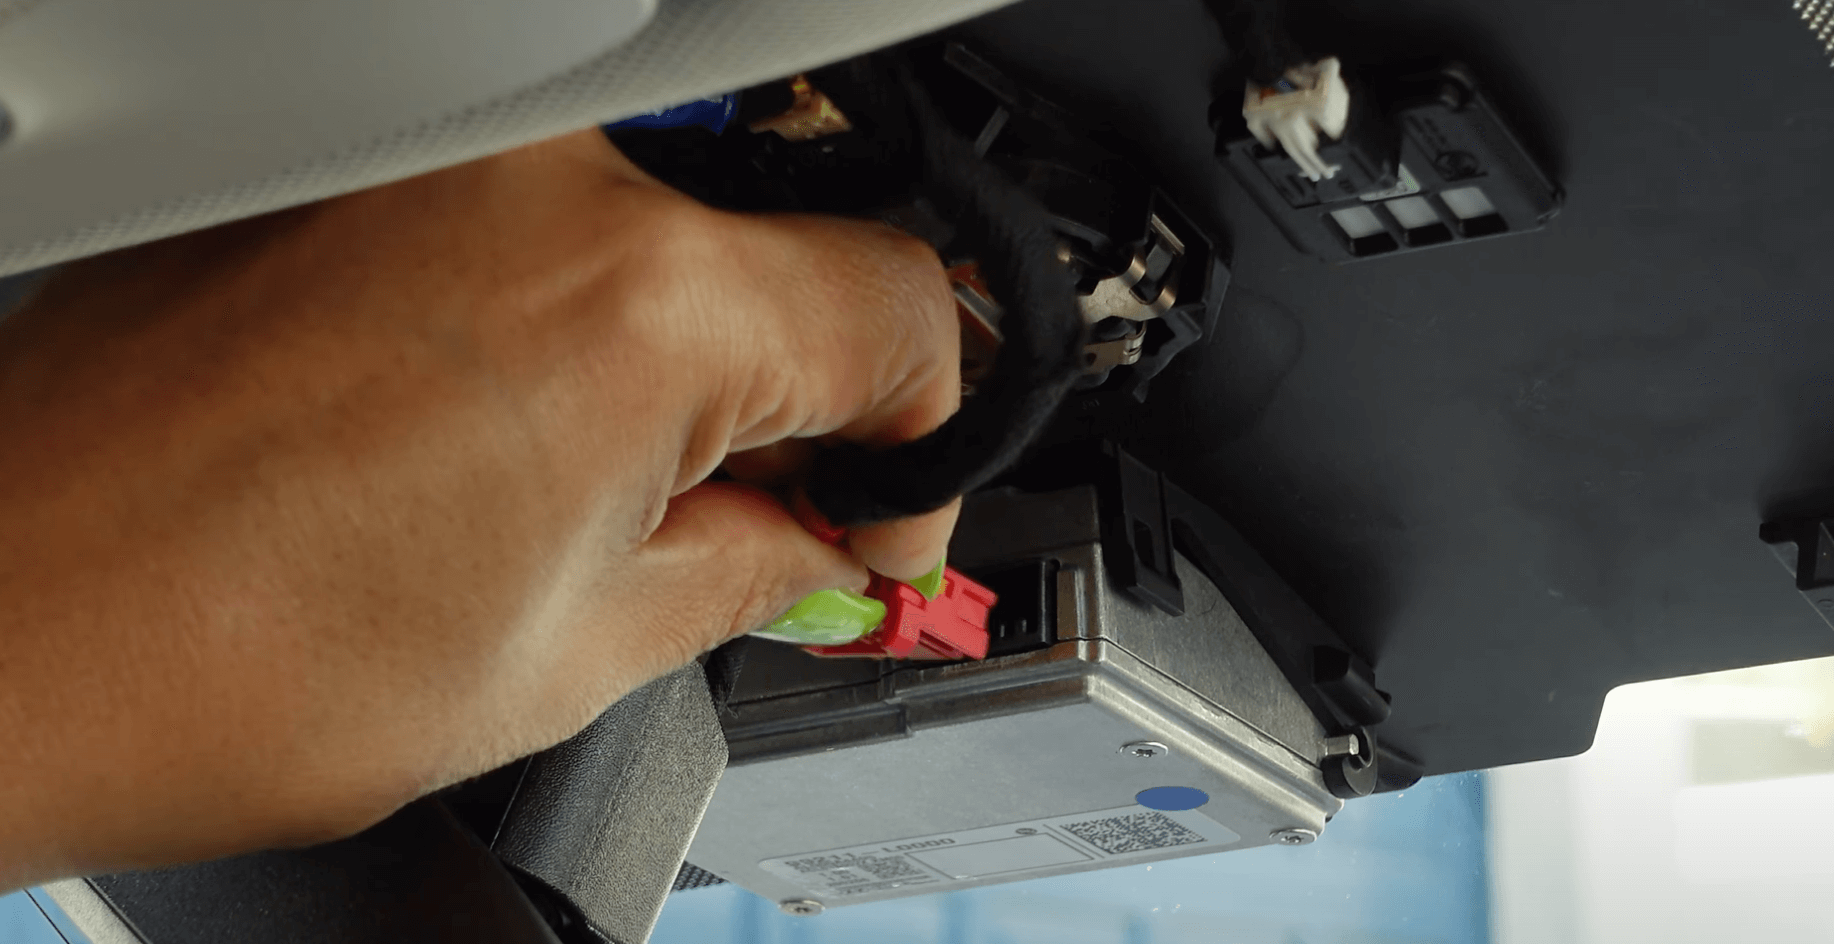
Remove camera connector. The connector color will vary depending on the vehicle.
Step 3: Plug the cars camera connecter into the harness
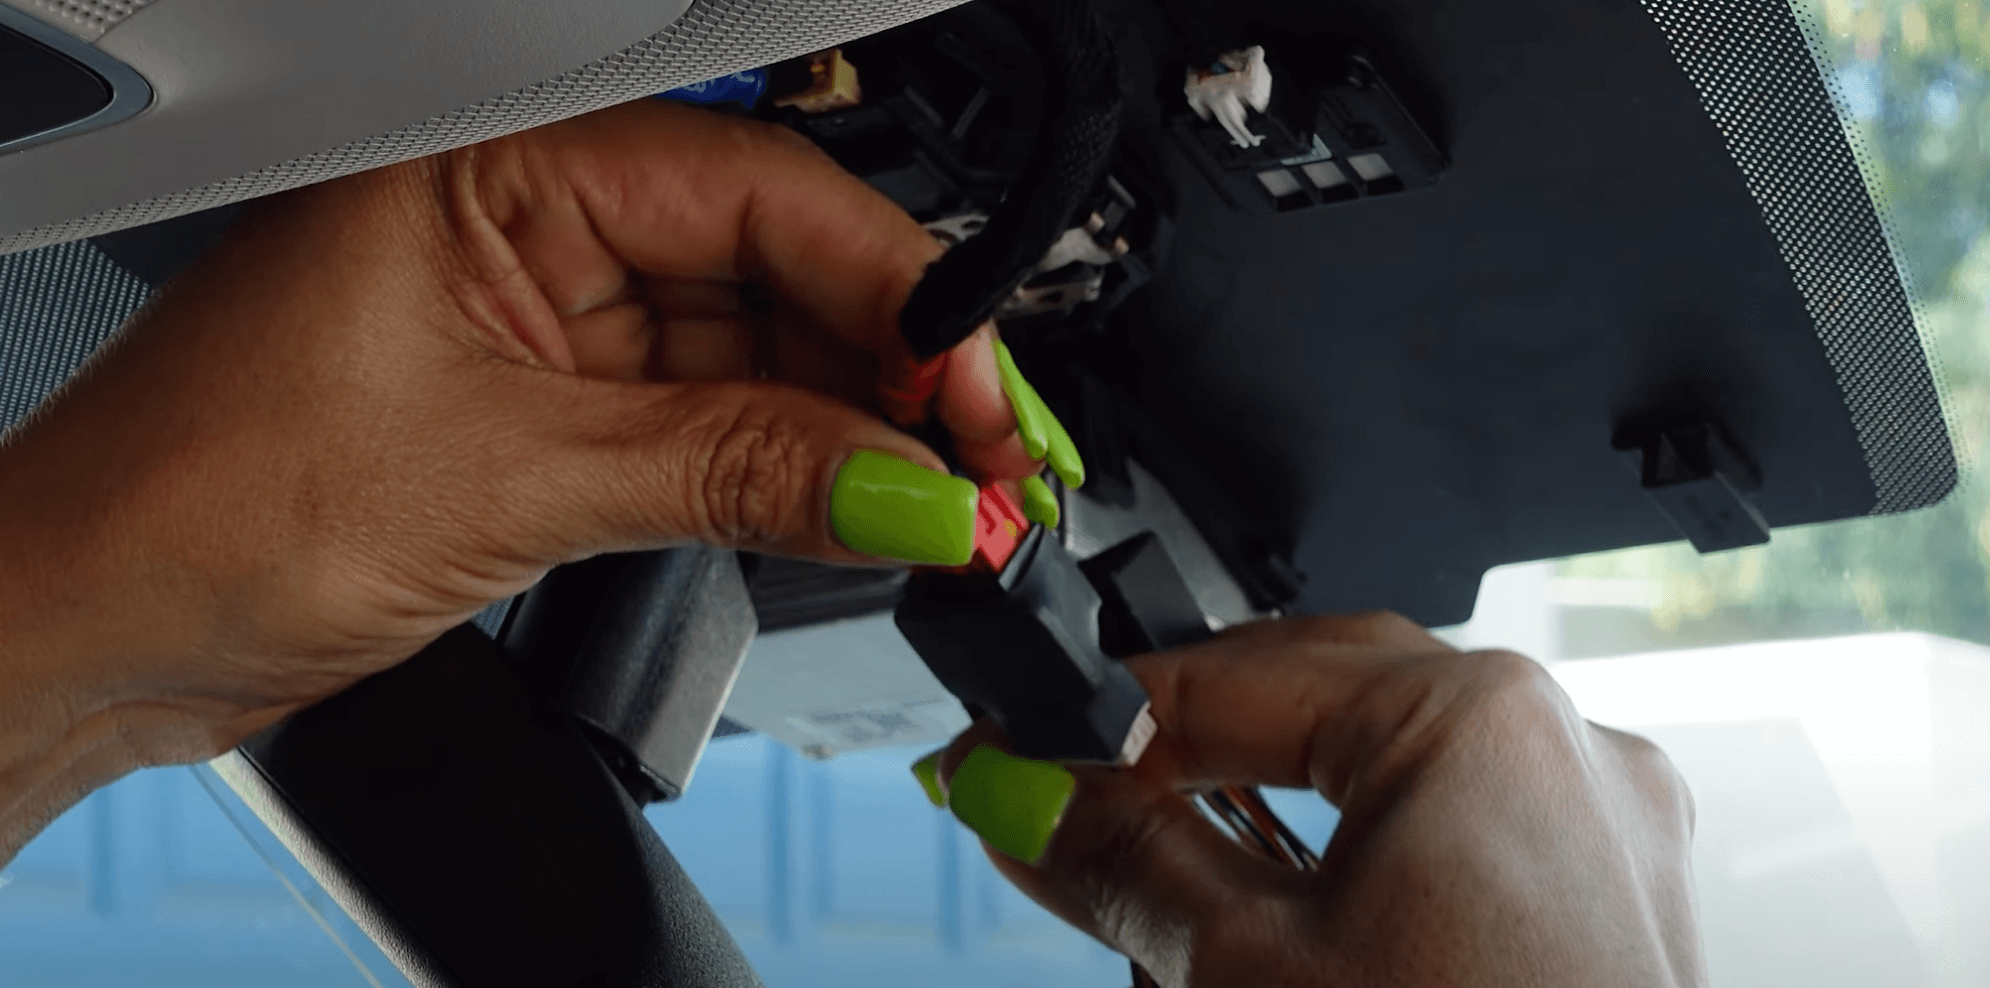
Plug the cars camera connecter into the harness
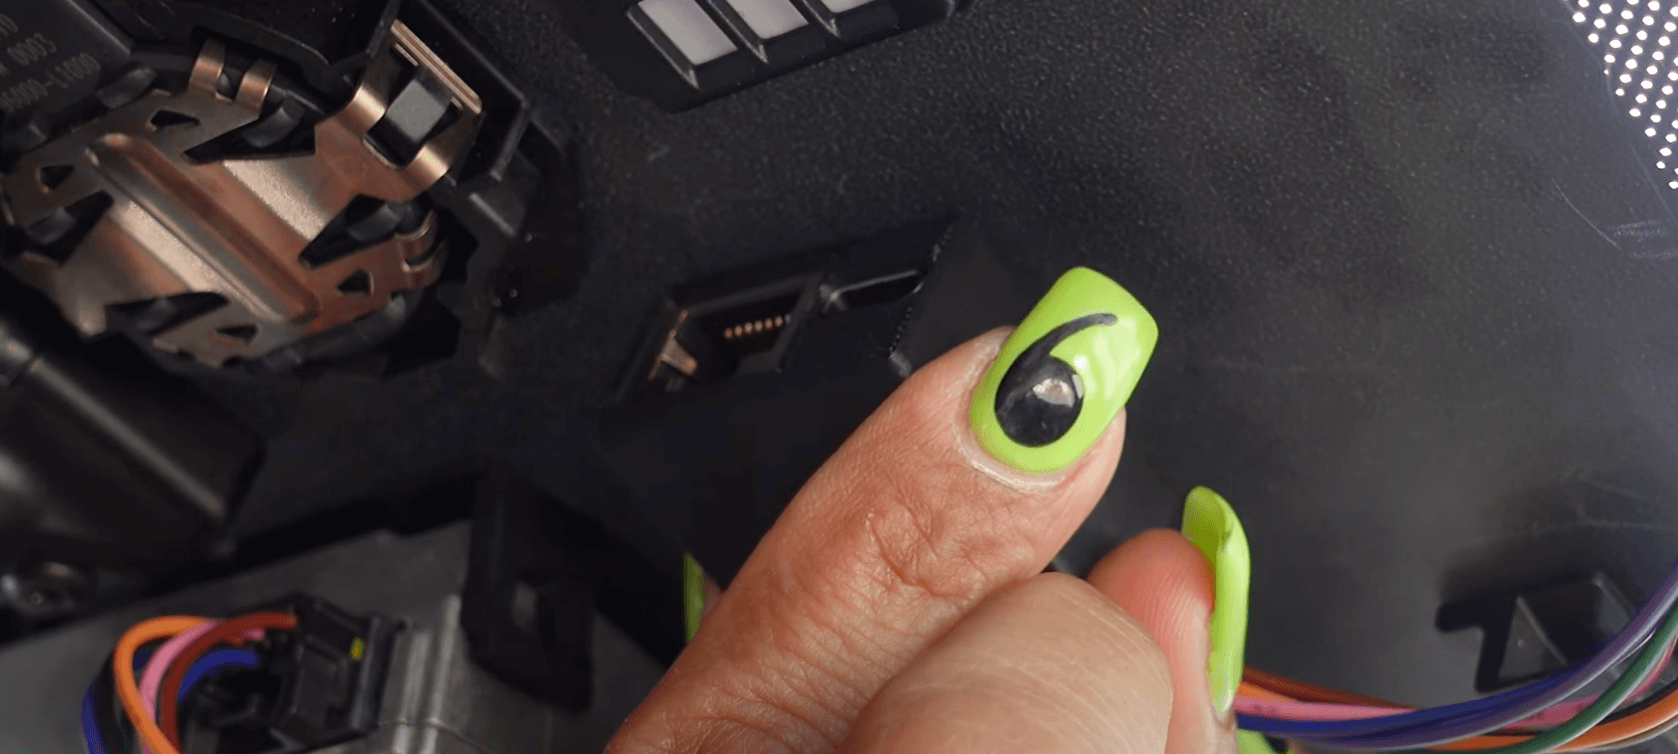
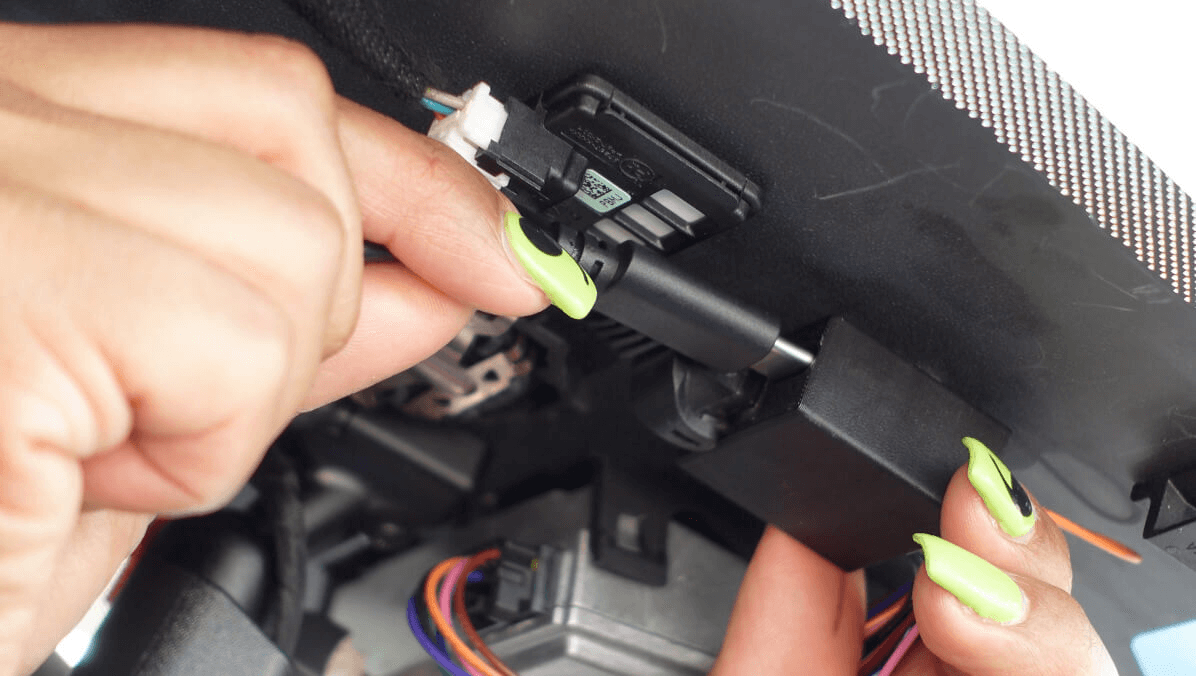
Step 4: Connect other end of harness to camera

The harness box should now be connecting the camera connecter cable to the car's LKAS camera.
Step 5: Securing Harness Box

- Peel off the red adhesive cover
- Find a place to stick the harness box so the trim can still be installed over it
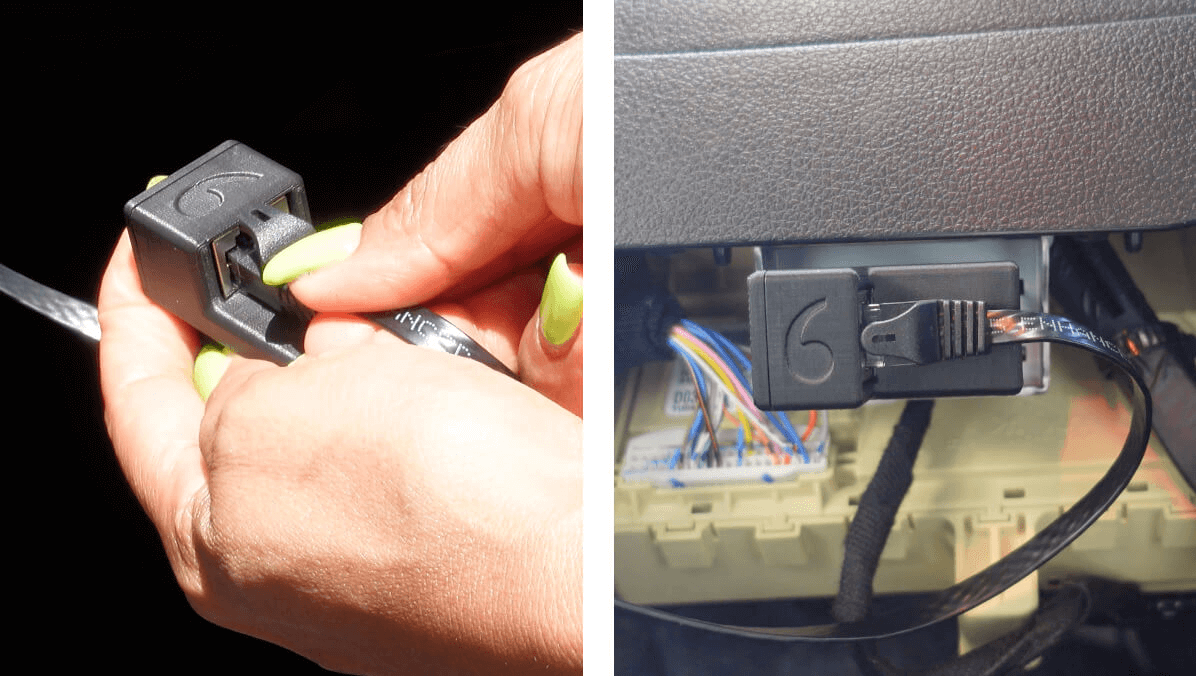
Step 6: Plug the RJ45 cable into the harness box
Use one hand to insert the RJ45 cable into the harness box. Use the other hand to apply pressure to the back of the harness box as shown in the picture. Ensure the cable is fully seated.
Step 7: Cable Management of RJ45 cable
The RJ45 cable must be brought across your car to your OBD-II port which is almost always found below the steering wheel to the left. Carefully run the cable behind the vehicle trim along the windshield, doorframe, or dash.
Step 8: Connecting RJ45 to comma power to OBD-II port
- Plug the RJ45 cable into the comma power
- Then plug the comma power into the OBD-II port.
Step 9: Plug in OBD-C into Harness Box
Plug the OBD-C cable into the harness box – Ensure the cable is fully seated. For comma 3X, ensure the straight end is connected to the harness box.
Step 10: Reinstall the rearview mirror cover trim
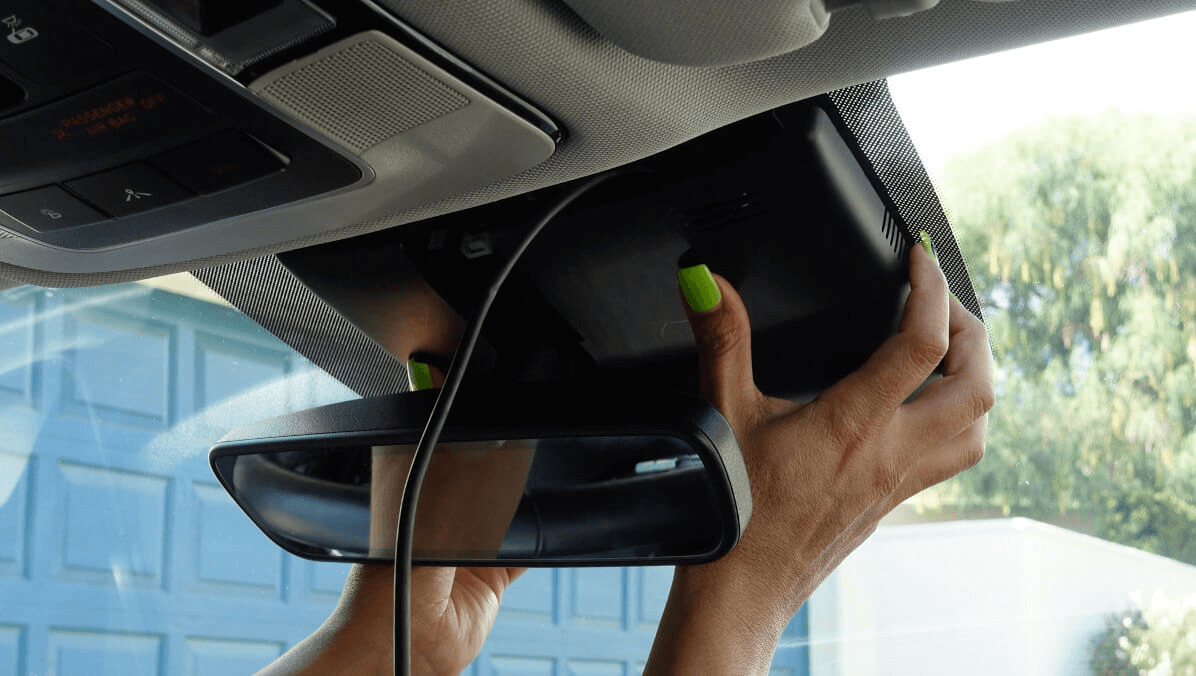
Ensure the car harness fully fits inside the trim. Have the OBD-C cable come out of the top.
Step 11: Clean the lenses
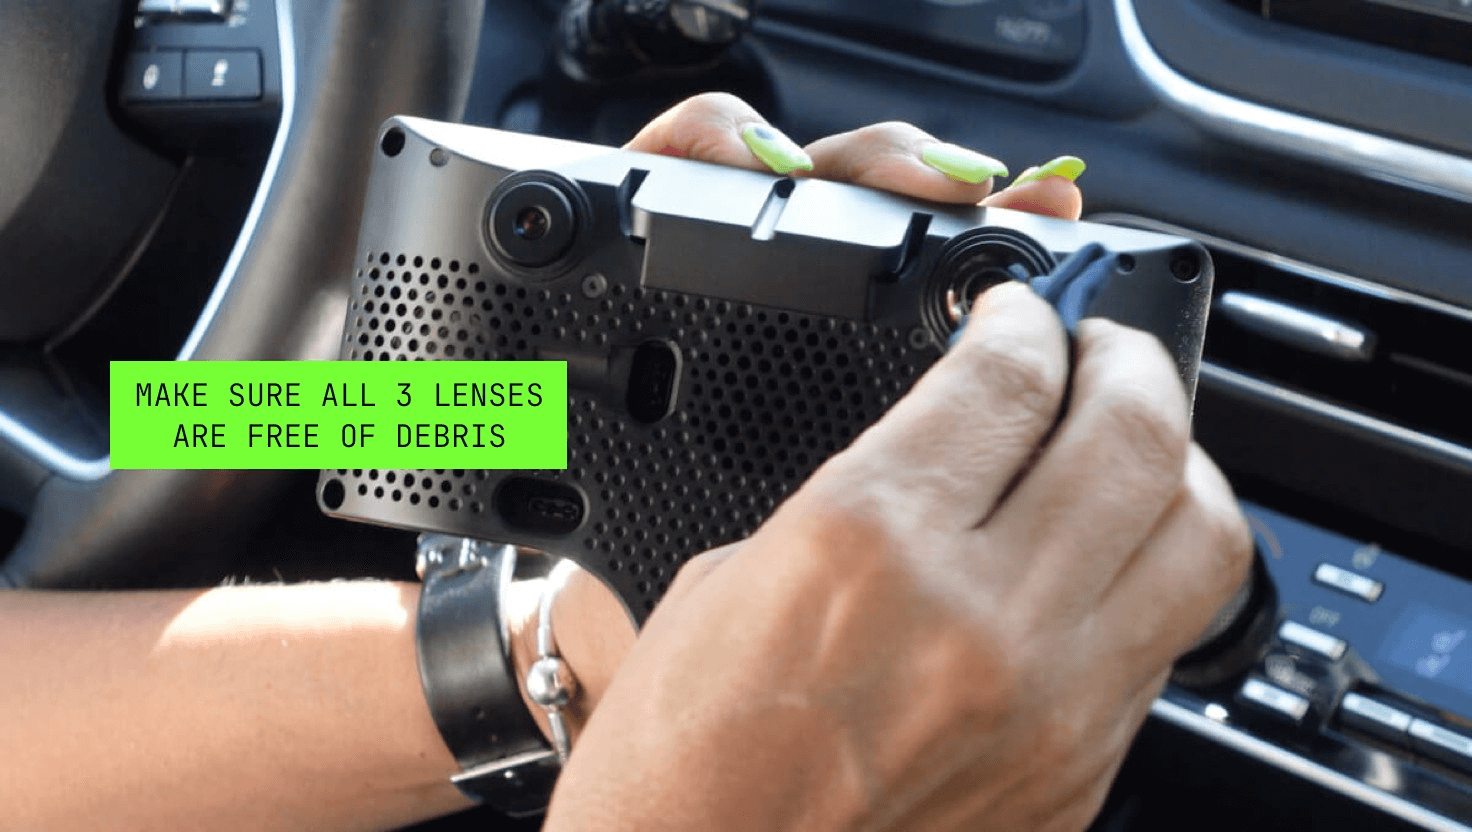
Clean all three lenses with the included microfiber cloth.
Step 12: Plug in OBD-C and mount the device
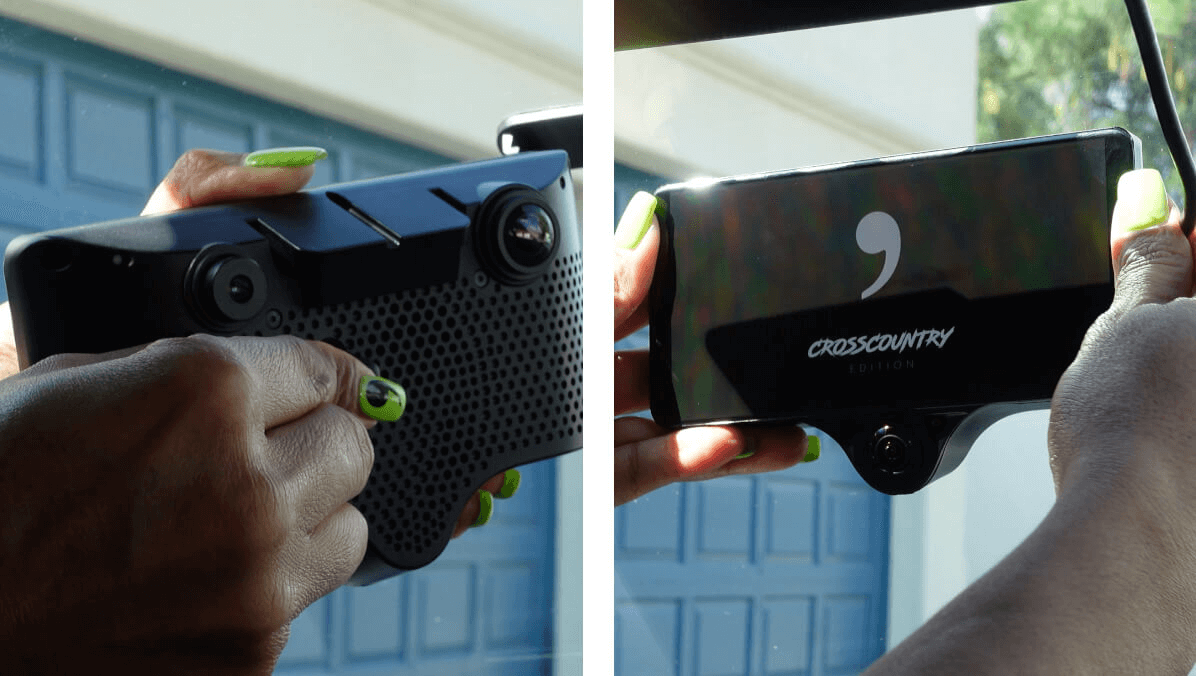
- Plug in the right-angle OBD-C cable into the back of the comma device. Make sure the cable is all the way in.
- Use both hands to align the mount on the device to the windshield mount. The device mount should be parallel to the mount on the windshield.
Some force may be necessary to initially slide the device on the mount. Before applying any force, ensure the device's mount is parallel to the mount on the windshield
Step 13: Give Yourself a High Five! 👍
You finished the hardware installation! Nice job!
Click the next button below to continue to the steps for installing the software on your device.